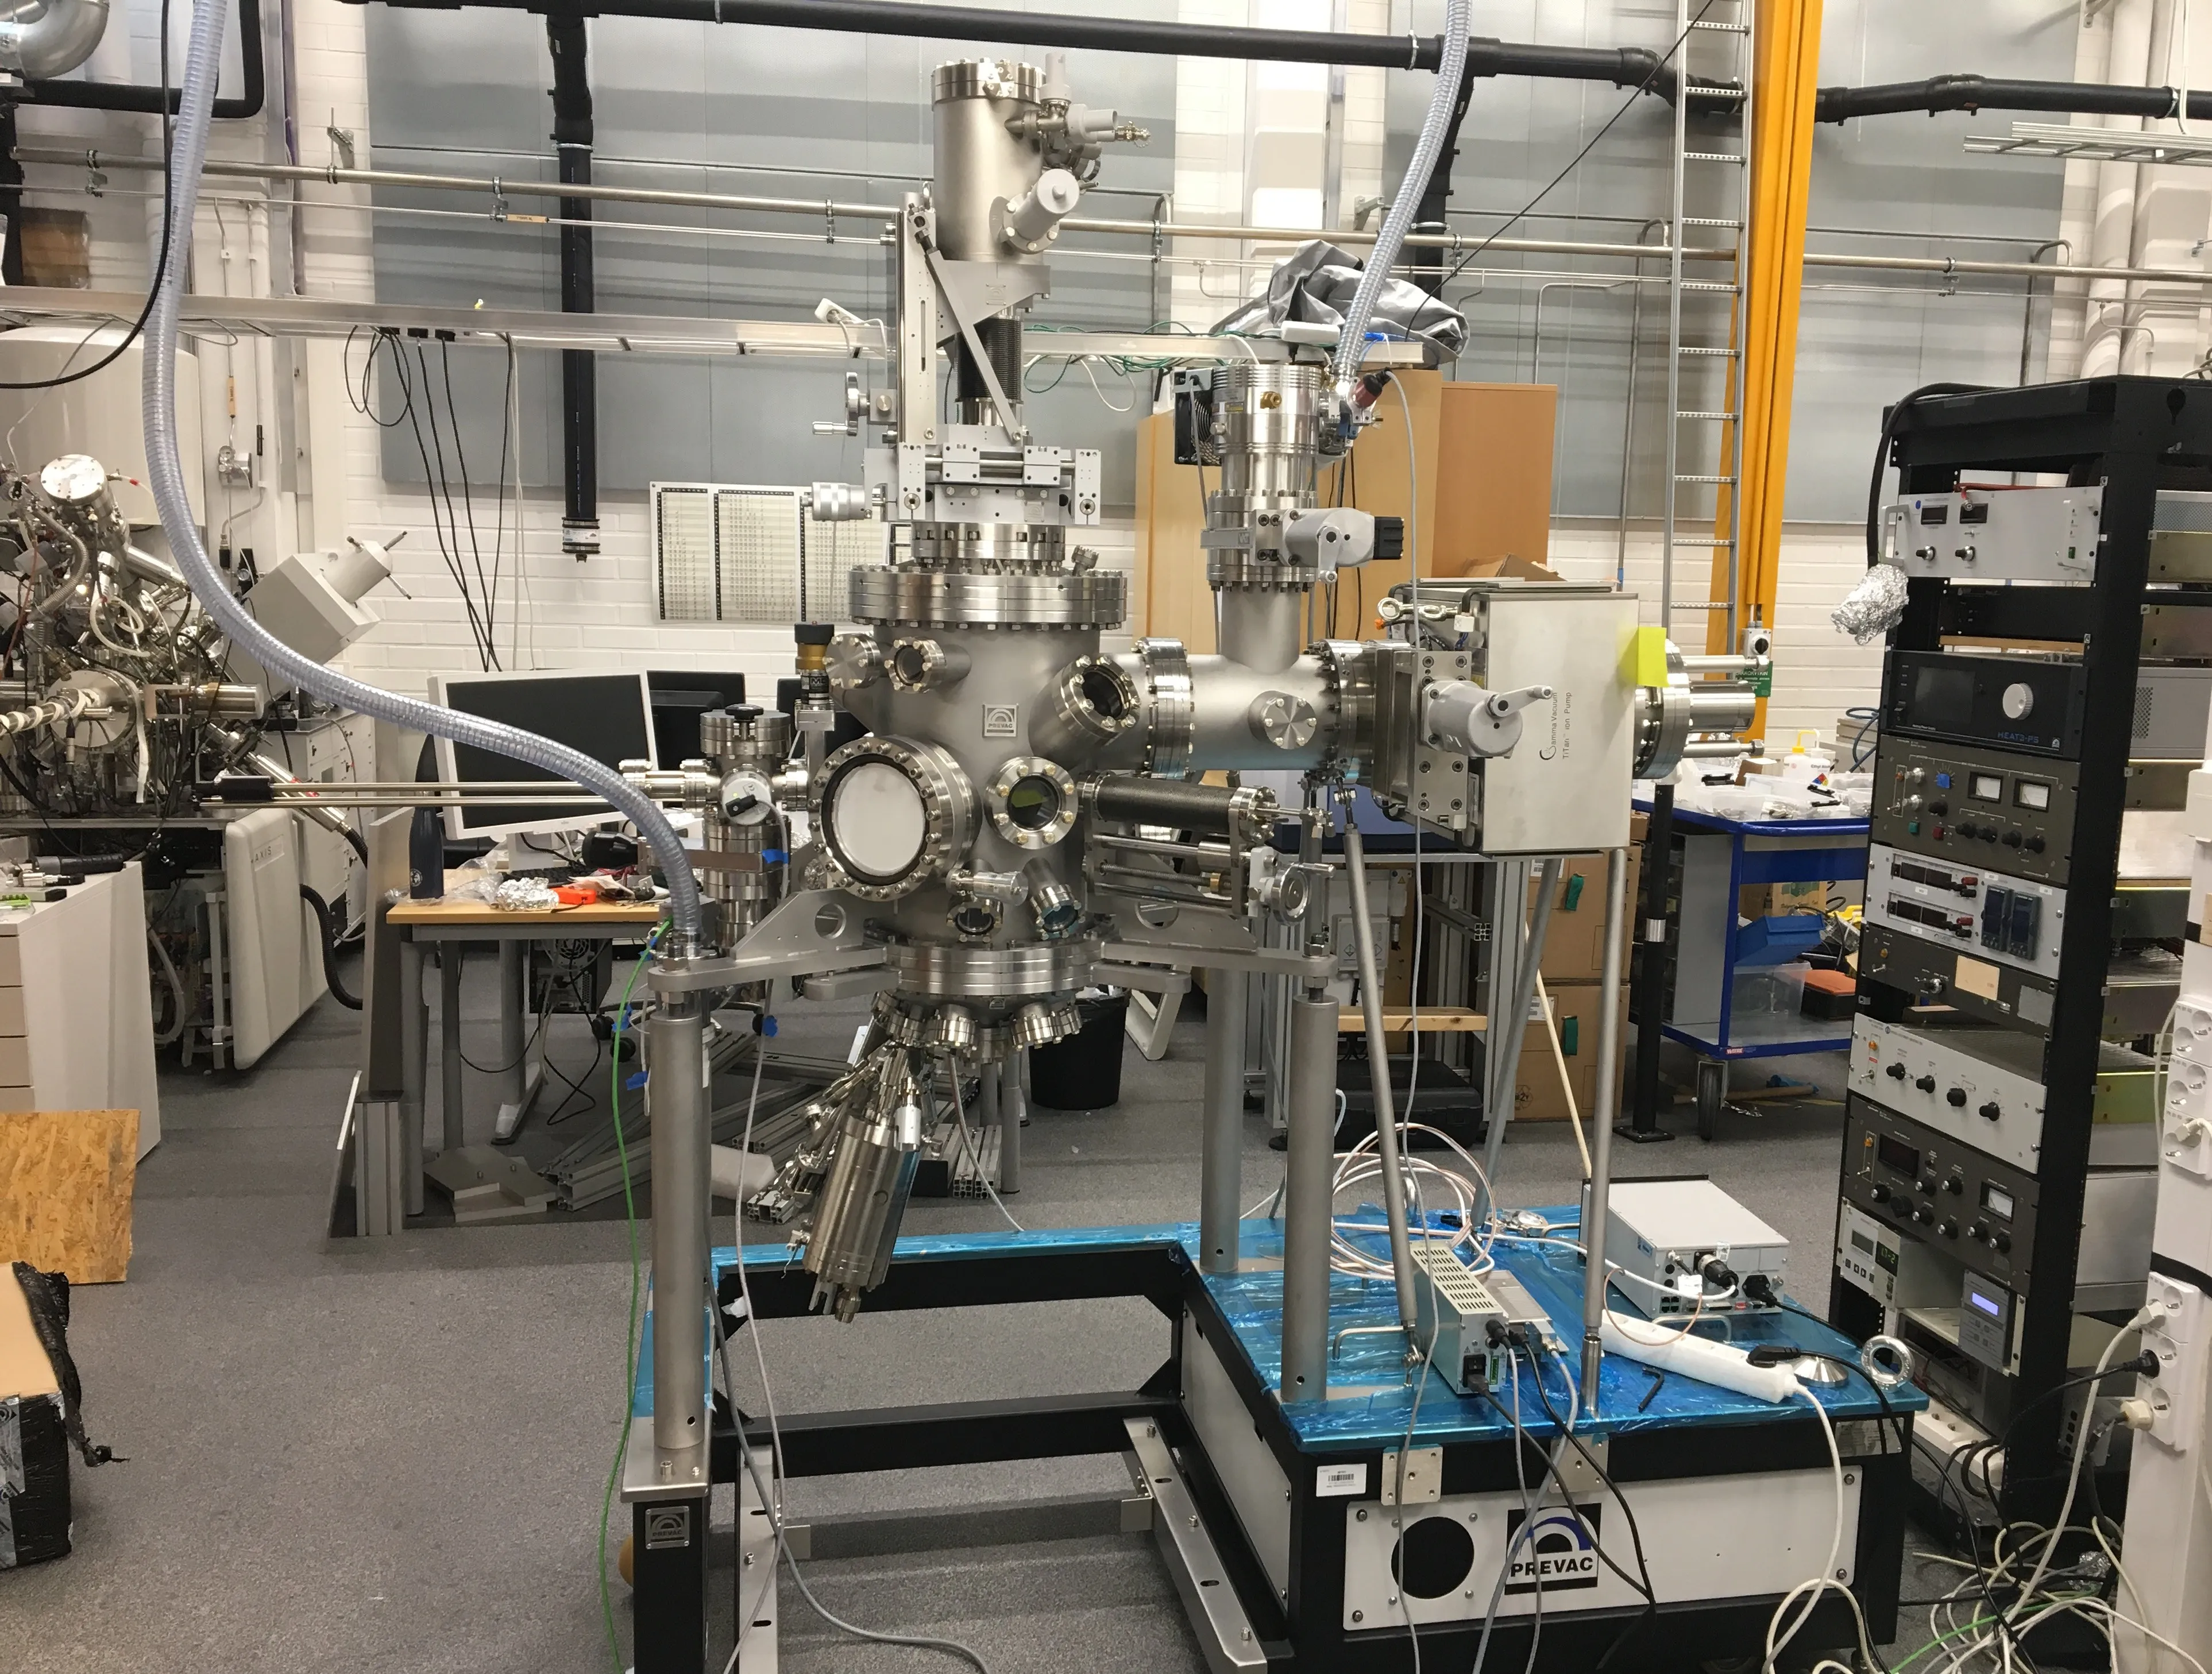
How to build a MBE?
Step 1: just buy one from a company :P
Prolog
How to build a building block to build the building block of artificial matters.
This blog is a developer diary of building up a molecular beam epitaxy set-up. I think it’s a good chance to share these first-hand experience of what practical things were happening and for reference for later possible similar construction for everyone, since not every group every student got a chance to assemble instruments.
A short summary of time line:
- Phase 0: the idea to buy a new chamber to replace the old one comes at March 2020. We gather enough information, request the quote and ask for custom design, and decide which to buy.
- Phase 1: finally signing the contract at end of July; confirming their design, then wait for manufacture and manufactor test and shipping.
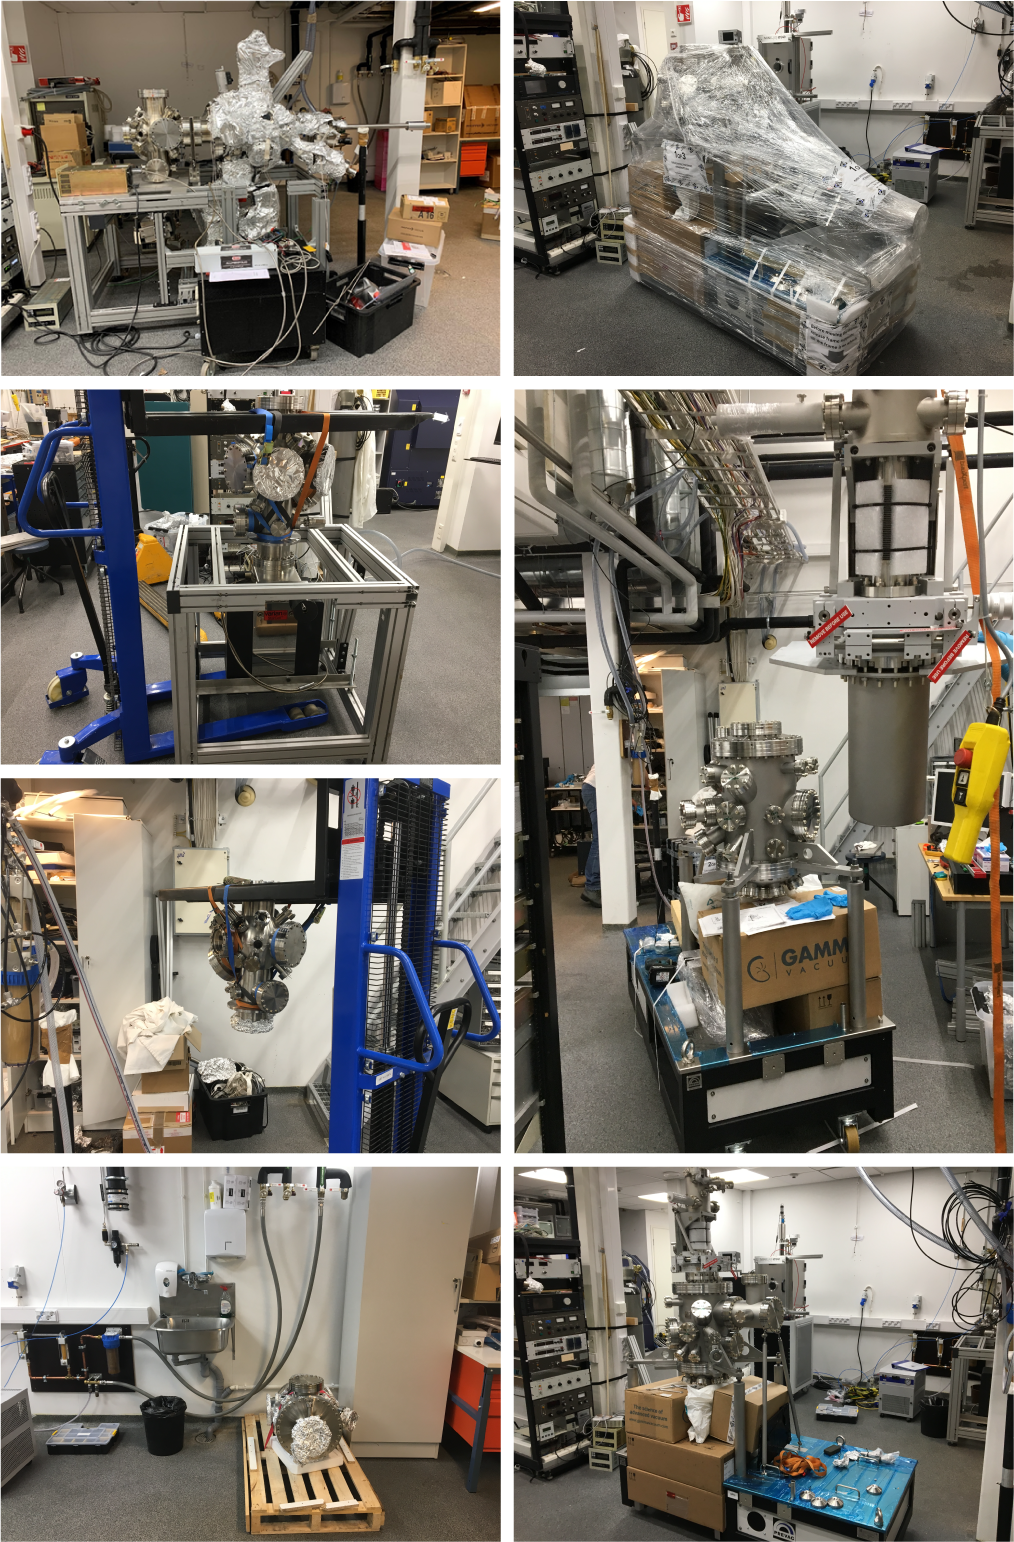
- Phase 2: The set-up finally arrive at end of year 2020. Soon we start to build. We first need to disassemble the old set-up, and recycle useful components; then assemble and put all part together. This takes around one month till early Feburary 2021.
- Phase 3: component test, to make sure every part works as it supposed; it finished at end of March 2021
Installation (Phase 2)
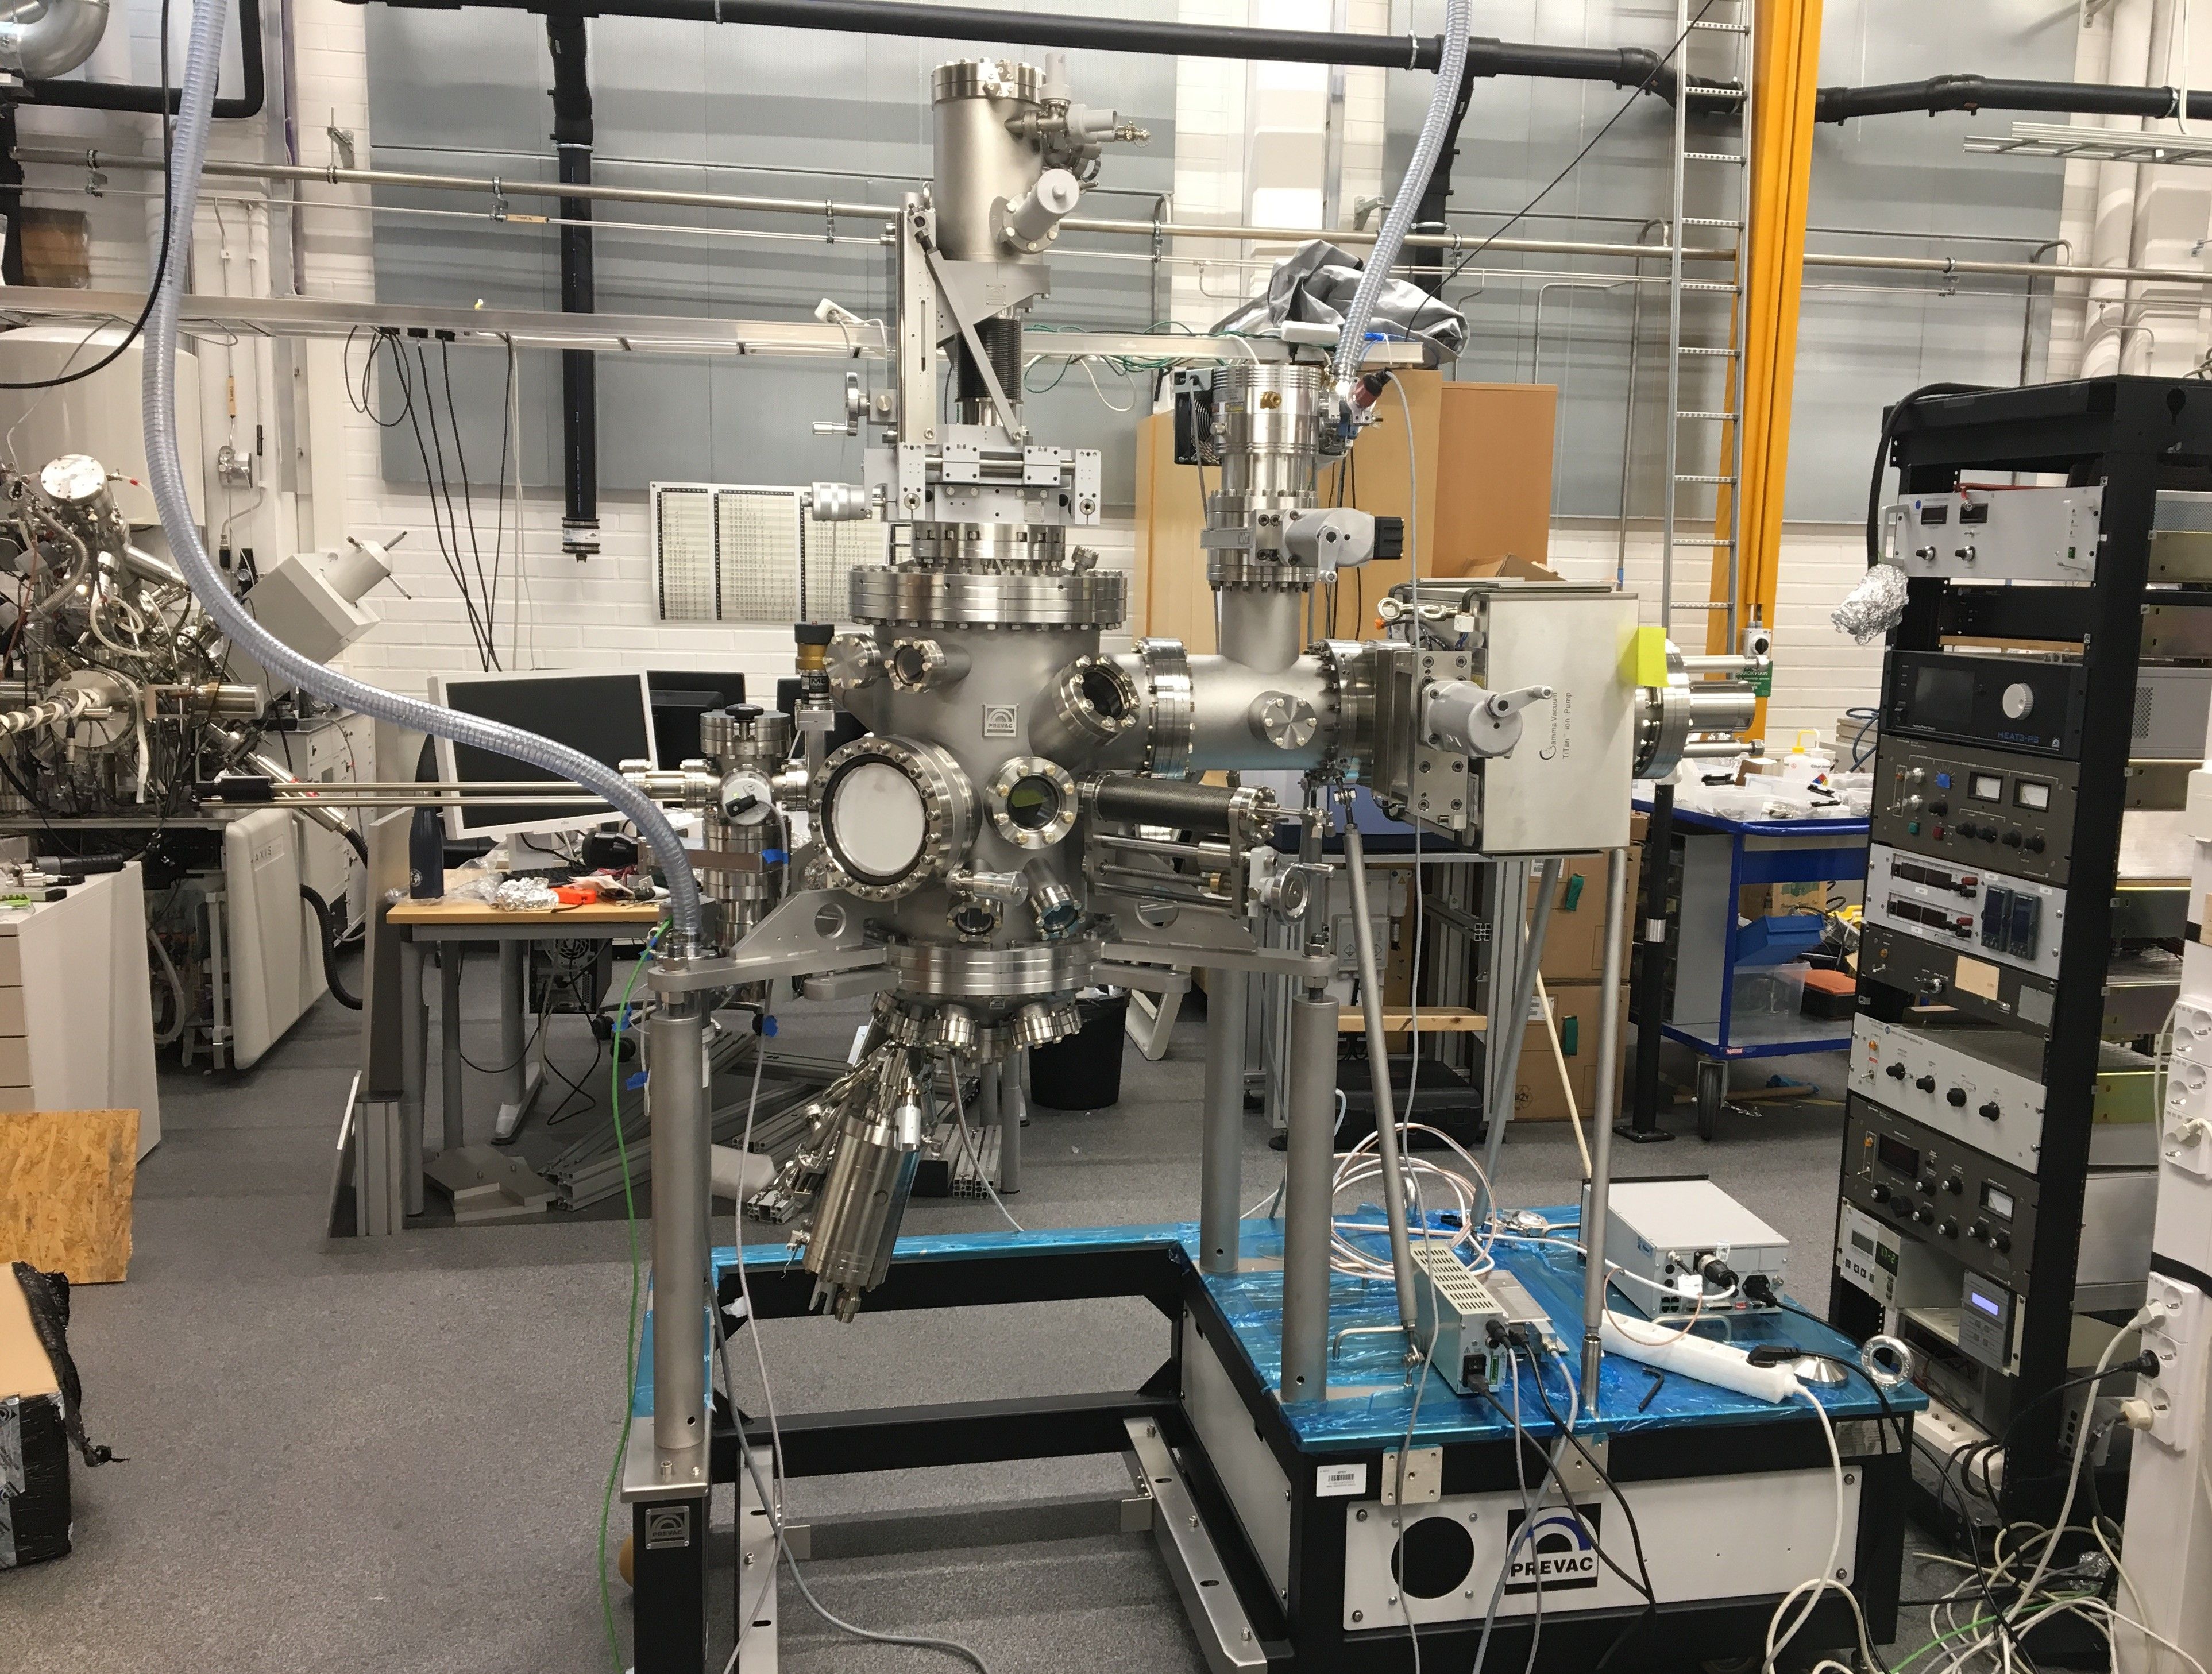
The new setup arrived in a truck at 20201222 10:05 AM Tuesday temperature 4°C pressure: 761 mmHg overcast with brief showers, Winds: SSW, 26 kph Humidity: 100% Precipitation: 0.03 cm.
It looks good, no scratches or no bending things. Since there is no shock detect sensor, we don’t know exact condition.
to do-es:
- dis-assemble windows and stops (7-8 Jan done)+ clean (12 Jan)
- dis-assemble electronic units, pumps, load-lock, RHEED screen.(11 Jan done)
- lift up old chamber + dis-attach ion pumps, analysis chamber (13 Jan done)
- cut frame in order to provide space for new chamber and connect to analysis chamber (21 Jan done)
- assemble everything
- connecting N2 line to loadlock
- cooling water tube panel
Installation Log:
-
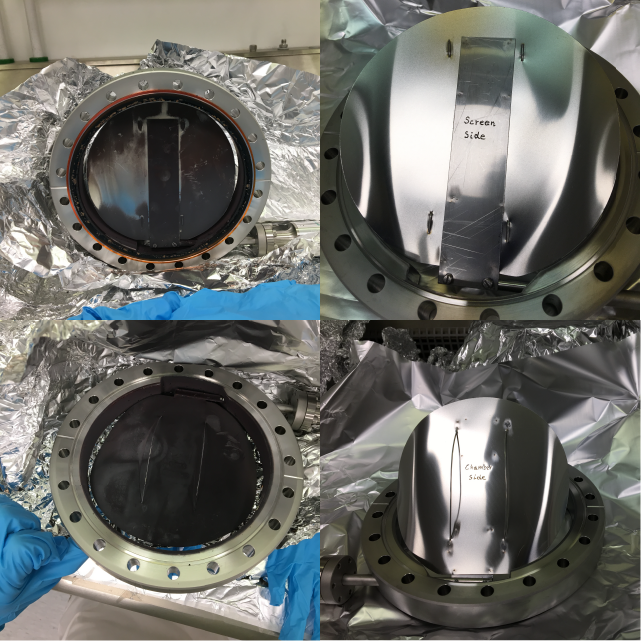
Jan 08: dis-assembled all windows and stops and flange gaskets, which are heavily contaminated with Se. Typical photo is like the following (like RHEED shutter). Tips: when Se flakes drop down, use tapes to adhere them.
-
Jan 11: dis-assemble load-lock, big turbo pumps, RHEED gun, RHEED screen, manipulator, Se evporator, metal EFM 3T evaporator.(11 Jan done)
-
Jan 12: clean some windows, find a broken one. Se is hard to wipe out, with tissue, hand paper, Kimtech / acetone, IPA. Maybe we could try normal tape to adhere and stick something out and wipe it clean.
-
Jan 13: detach main chamber from analysis chamber, ion pump. detach the turbo, tsp, T connet from analysis chamber - to provide space for ion pump.
-
Jan 14: detach and lift up analysis chamber (detached LEED first), to keep the frame free in order to cut it into size we want for analysis chamber. cleaned view ports using tape.
-
Jan 15: Vacant (colleague ’s defense)
-
Jan 18: cleaned gate value (big turbo)
-
Jan 19: workshop buddies helped us cutting frame. Cleaned gate valve for old ion pump.
-
Jan 20: workshop buddies helped assembling frame (all finished). Cleaned RHEED.screen.shutter .
-
Jan 21: assembled analysis chamber to the new frame, and assembled gate valve, ion pump to analysis chamber (! ion pump, analysis chamber now are all mounted on the 4 supporting legs for ion pump !). Moved in our fresh new designed compat chic system.
-
Jan 22: mount manipulator to new MBE chamber (with yellow crane beam).
-
Jan 25: lab zone blocked access for other instrument installation. Received new baking tape.
-
Jan 26: lab zone blocked.
-
Jan 27: lab zone blocked. Cleaned DN 160 CF gate valve (was for MBE chamber and analysis chamber, will be for new ion pump.)
-
Jan 28: lab zone blocked. Cleaned DN 160 CF gate valve.
-
Jan 29: lab zone blocked. Cleaned RHEED.screen.shutter.
-
Feb 01: Mount big turbo (gate valve), gate valve for new ion pump and gate valve for loadlock.
-
Feb 02: Mount ion pump (with support leg) using blue forklift (very smoothly) glide in, loadlock part with gauge and turbo. mount all windows (normal ones and CaF2 with reducer). mount the vacuum gauge (with cable). cleaned linear_shift.grab_machanics (with patapata, sonicated with IPA+acetone). Very efficient and fruitful day.
-
Feb 03: Clean metal evaporator EFM 3T (and check, and change the Fe to Mn). Assemble back linear_shift.grab_machanics. Mount linear shift (with a small blank extension, provide space for sample transfer holder rod). helping for the leak check of gate valve (for EFM 3T) and bellow extension (for Se cracker) (They are all leak while bellow is fixed by vac seal.)
-
Feb 04: Testing the linear shift working compatibility with manipulator (good, take down). Mount Rheed.gun, Rheed.screen.shutter, Rheed.screen. Opened all parcels and inspected all thing should arrive have already arrived.
-
Feb 05: evaporator EFM 3T (without gate valve), Se cracker (refill it also). We asked workshop buddies to manufacture some headless screw M8 or M6 for ion pump, loadlock.gate_valve, evaporator EFM 3T, Se cracker. Start pumping in the afternoon.
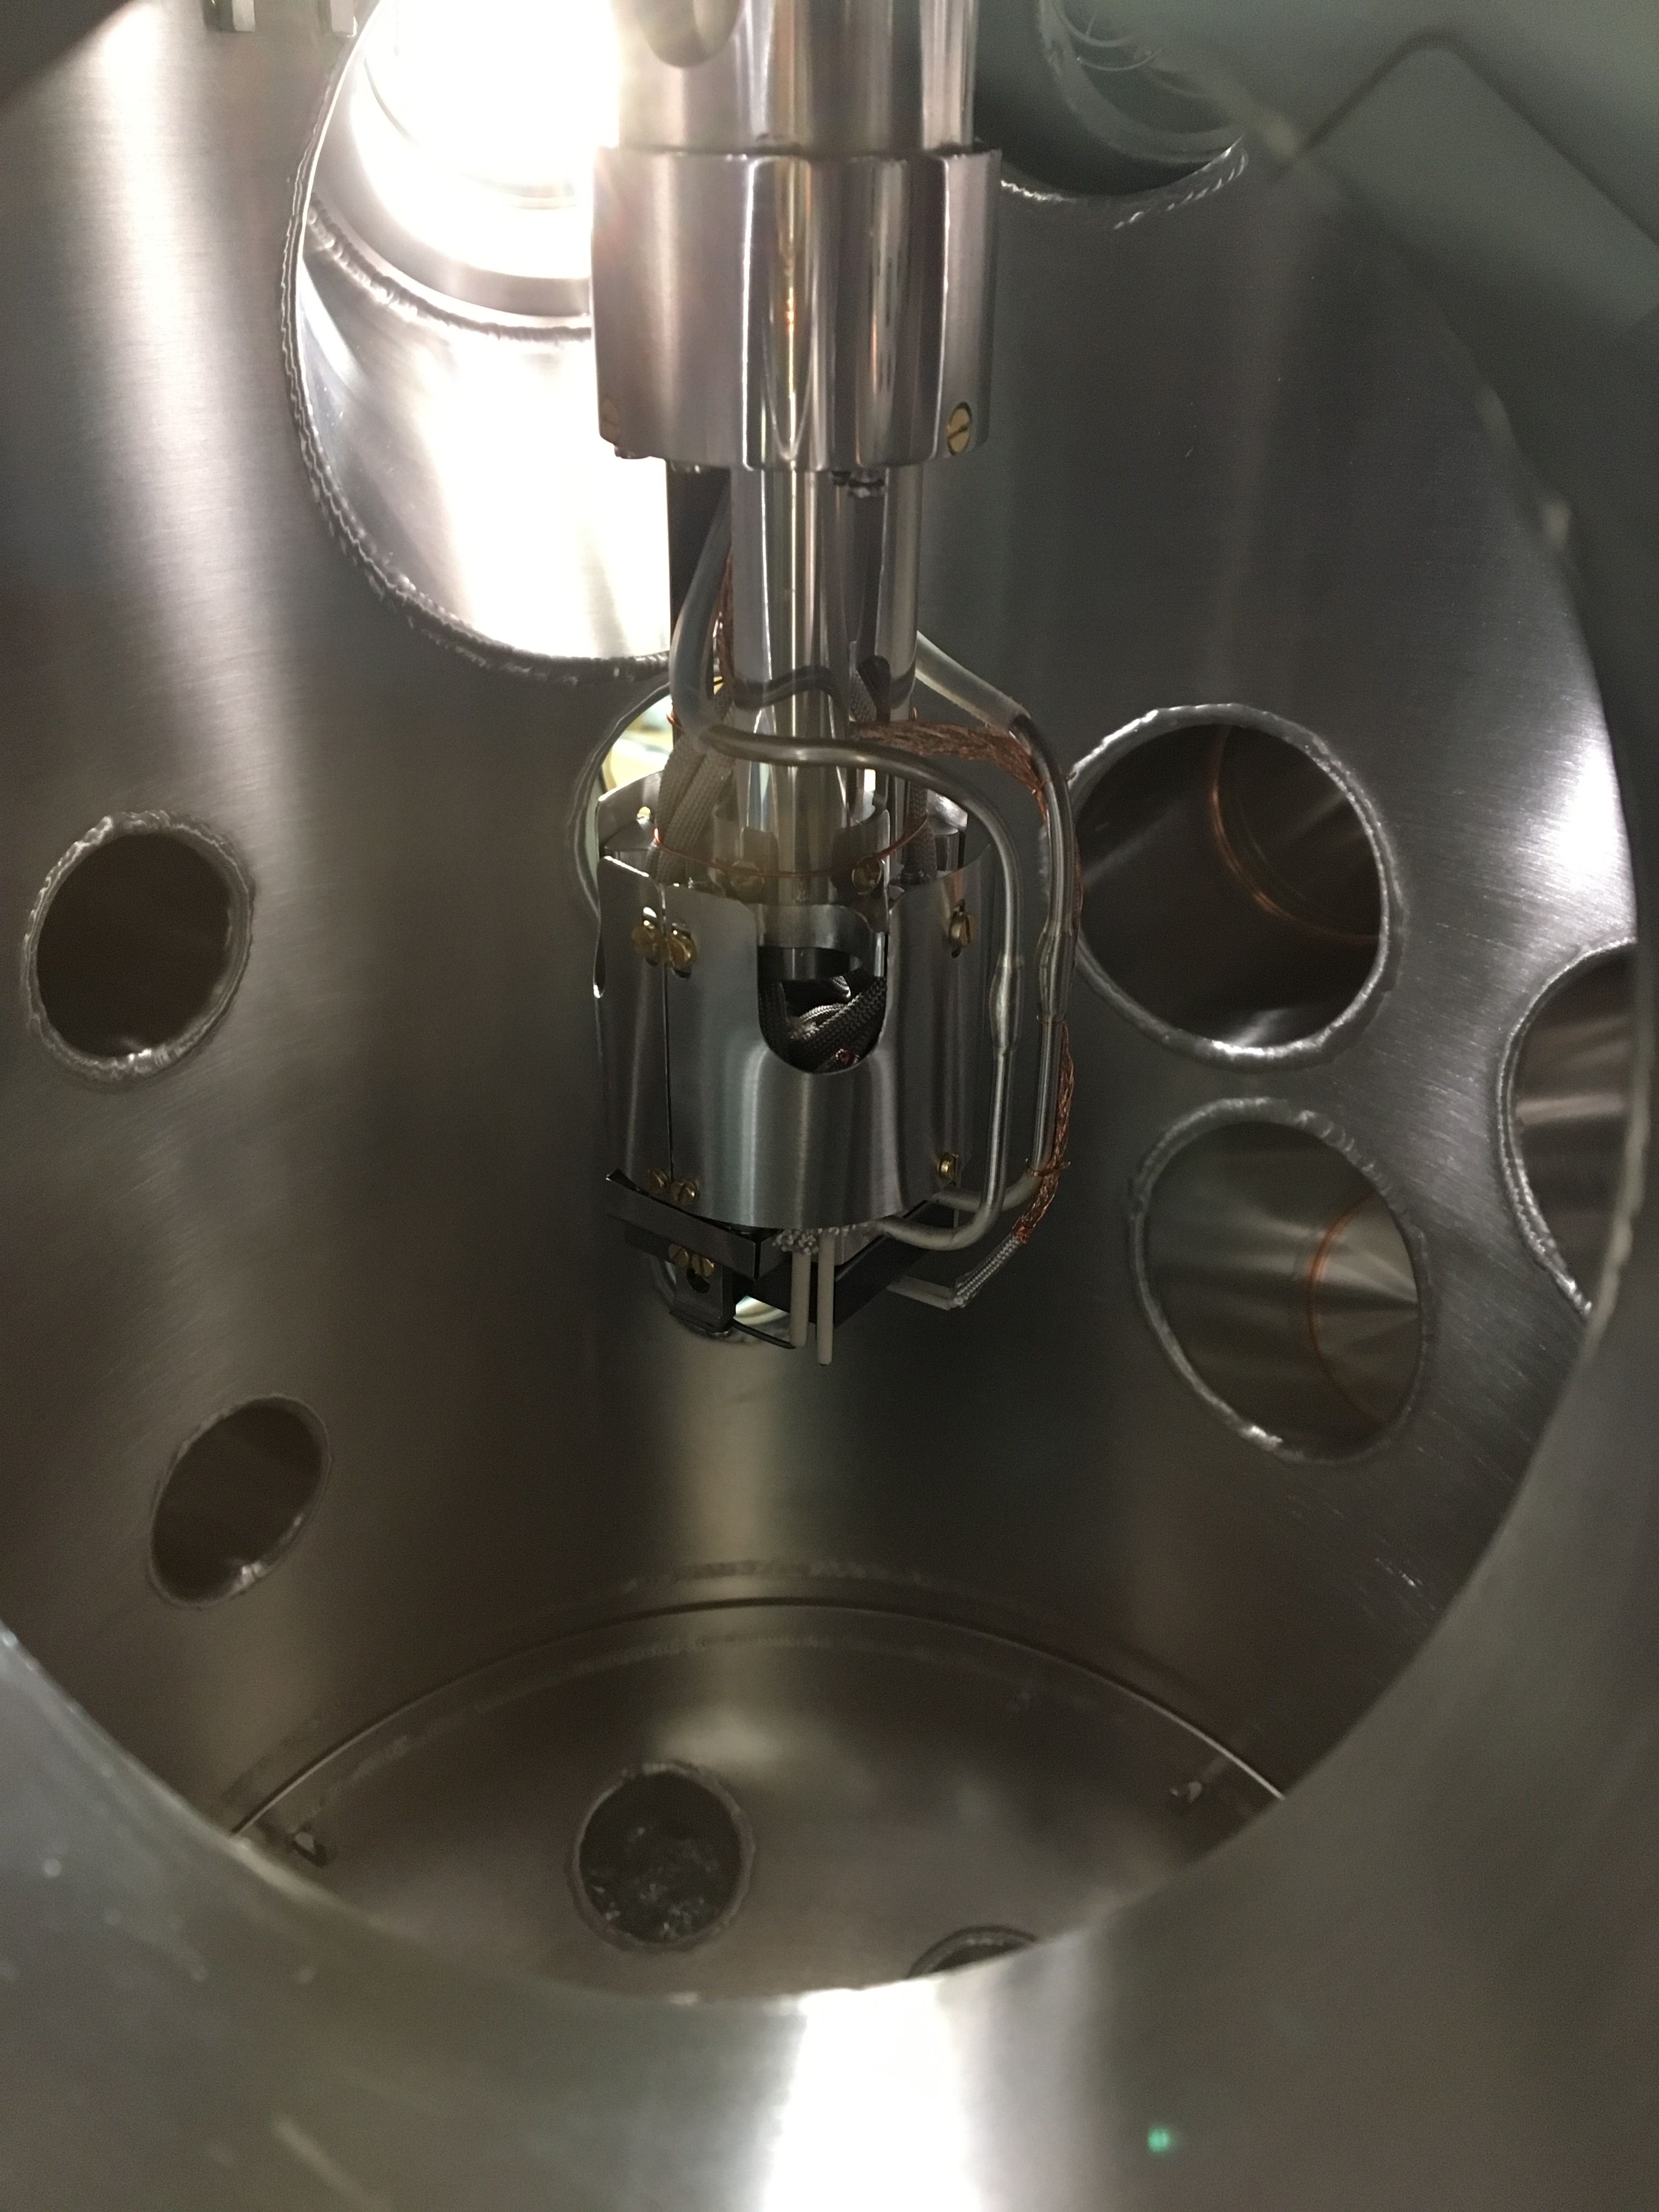
just for a moment.
99.999% Invisible
small-nano-micro details:
- gasket: for view ports - DN 63 have thinner gasket (larger inner diameter), not blocking the view.
- gasket: for something else - DN 40 have thinner gasket (larger inner diameter), not blocking the way. while DN 63’s thinner gasket is more expensive, DN 40’s is almost the same price (from the supplier).
- evaporator pointing direction: not point to the view port
- RHEED.screen.shutter: not blocking the RHEED pattern, and not blocking the evaporator/cracker. AND it need to tighten well - due to two gasket sealing at one place.
- Ion pump - better mount not at bottom, so nothing will drop into it.
- RHEED gun mounting position: follow the manual directions - so pattern position, X, Y direction will be good, easy to distinguish
- gauge.electronic part: it has three screw to fix but they are not in equivalent position - in other words, it has a direction to mount.
- NOT-standard screw is used for headless screw M8 or M6 for ion pump, loadlock.gate_valve, evaporator EFM 3T, Se cracker. Made by workshop buddies.
Final tests (Phase 3)
The main part of assembling of chamber is finished at afternoon of Feb 5th, 2021.
This part is for first-hand practical testing of new-arrival set-up.
initial try / general operation / maintanance
to do-es:
- pump, without ion pump.
- pump, with ion pump.
- bakeout. leak check.
- gauge controller (Feb 8 is good).
- ion pump controller
- manipulator, resistive heating + EB heating
- degas evporator EFM 3T, Se cracker.
- quartz-balence.
- RHEED.
next time when open the chamber, things to fix:
- ion pump connection
- mount RGA
- linear_shift.grab_mechanism, need to ideally centered
- take out the dropping sample holder
next time when open the chamber, things to fix, again:
- change the rod of Mn of EFM 3T.
- leaking gate valve between main chamber and EFM 3T.
- leaking blank stop at gate valve to analysis chamber.
- mass pectra changing position (now it’s too near pumps)
- gauge change its rotations
Testing log:
-
Feb 05: start pumping by loadlock turbo, big turbo. Ion pump is OFF. (loadlock.gauge =2.4 E-6 mbar) (default pressure is mbar)
-
Feb 08: (before gauge is ON, loadlock.gauge =1.4 E-7 mbar) Gauge is now ON, need to change filament number to “2” (default is 1). Gauge is “NUDE-UHV-8A”. Degased once (default setting, 3 min)
-
Feb 09: vacant (interviewing summer student)
-
Feb 10: changing the electronics position of the nearby shelf. Gauge = 9.x E-8, without baking!!! While the bitter story is, ion pump has a short circuit between the feedthrough tip and the pump body, yet resistance should be infinite.
-
Feb 11: vacant (waiting for manufactor reply, interviewing summer student). Gauge = 8.x E-8. Prepared a SiC sample for RHEED in loadlock.
-
Feb 12: reply from manufactor:
-
“There might be several reasons behind it, most likely:
- Feedthrough isolators might be damaged.
- Some particale might fell inside the pump creating shortage.
- There is some acumulation of humudity or contamination in pump ceramics causing short. In this case proper pump bakeout might help. Although probability that this is a reason seems very small, short would be much smaller, probably occuring only after applying some voltage on pump - i would rather expect point 1 or 2.”
-
Reply to them with more details. “Thanks for your reply. In the attachment there are some photos of how ion pump inside look like just before we mount it at Feb 2. So as the illustration (*the figure in the later part of this blog) shows, from my view, there might be two suspicious places that might cause the short circuit problem. We didn’t start pump before. It was the first attempt of connection. So at afternoon Feb 10, the whole chamber’s vacuum is 9 E-8 mbar by turbo pump, and we are trying to connect cables and electronics to the ion pump (as I mentioned before, so that afternoon we just uncap the plastic cap outside the feedthrough). And then we found the electronics can’t apply any voltage to the ion pump. So we try to where the problem is, and found the short circuit.”
-
in the afternoon try to get RHEED pattern. Not succeeded. then try to get a pattern when sample was at the manipulator. In the end, the sample holder (ring part) is bend.
-
-
Feb 15:
- take out the sample first, and bend it back (watch out next time for Ta sample holder).
- Test again of Rheed. Cannot get Rheed pattern. RHEED.screen.camera is not ideal - the area it capture is too small (just a tiny area of the RHEED.screen, because its largest focal length is ~5 cm).
- Take out RHEED.camera (with bellow part) for later test.
- Confirmed there still some screw or ceramic of thermocouple blocking in the way of Rheed beam.
- Take out sample holder which manufactor send us, insert another one.
- Confirmed there is problem + why take out sample is difficult = linear_shift.grab_mechanism - it’s not ideally centered, which means when rotating to grab, it also apply forces to sample, so friction between sample and manipulator is larger than before. (it’s also observed when inserting sample, when rotating to release and withdraw linear shift, the center of grab mechanism is not aligned with center of the sample holder ear part.
-
Feb 16:
-
(Morning help at other instrument with XPS)
-
Morning inserted another sample (actually the third one.), which the sample plane is much higher than other parts of manipulator.
-
Monring workshop buddies install the girder beam over the setup, to hanging the cable - in order to no mess
-
”The electric wire (at circle 2 position) can’t touch anything , try adjust it by hand, and check short circuit by multimeter, if it’s free of contact to ground, pump schould working well. In my opiniom problem is in point 2. ”
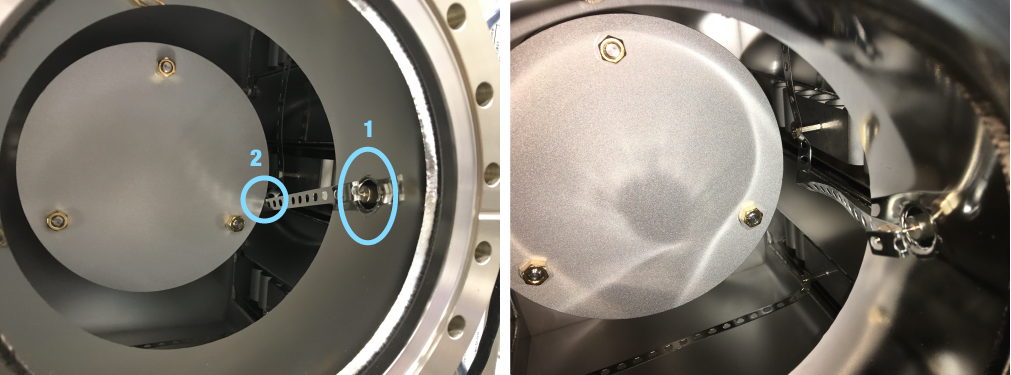
Fixing the ion pump short problem. - afternoon test RHEED again. get a RHEED pattern. (but EB isn’t / won’t working properly with is manipulator. )
-
-
Feb 17:
-
solved the RHEED.Screen.camera focal length problem (can’t capture the whole screen) - by taking out spacer rings - now it only have one 0.5 mm spacer in camera.
-
Quote email reply from its manufactor:
Thank you for the pictures - this explains the problem. You have two 1mm spacer rings added between the lens and the camera:
This increases the magnification too much, causing the short focal length and magnification problem you are seeing. Please remove both of the 1mm spacer rings and add a single 0.5mm spacer ring (supplied with the system when purchased), and then you should have the proper magnification and focal length.
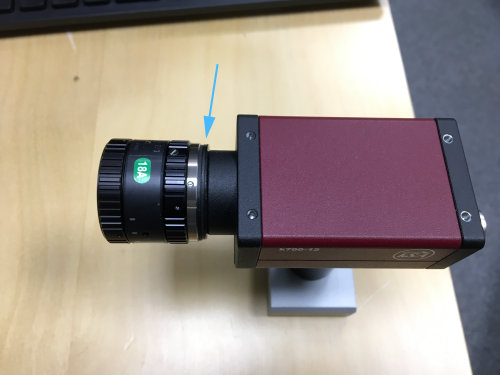
Fixing the RHEED.screen.camera focusing problem. - preparing cooling water pipes for Quartz balance. It uses a uncommon fitting. Also water leaks crazily from building cooling water junction and filter.other parts no leaking as far as we know.
- Quote from it manual: never run quartz balance without cooling water.
- Tested a bit: quartz balance module TM14, monitor TMC13, and work good.
-
-
Feb 18:
- vent chamber. take out ion pump, maybe fix the short circuit problem (at least optical eye says no contact and multimeter says no short.) and put ion pump back.
- take out dropping sample holder (dropped when shaking the chamber part for saving ion pump…, and it’s a thin one - easy to glide).
- Mount RGA.
- add a gate valve before evaporator EFM 3T - also add a shutter back to EFM 3T)
-
Feb 19:
- morning for cleaning prep room.
- Mount the mini gate valve at EFM 3T for seperate pumping.
- Mount EFM 3T.
- Fix the linear shift grab mechanism center dedeviating problem (change to previous linear shift - the new one is not straight when rotation - while the old one is not perfectly perfect but better).
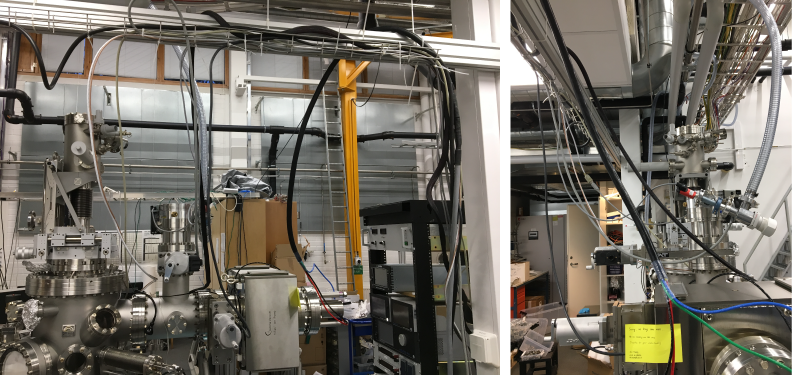
- Add airmatic system (Put cables/wires in order / hang over high space). Start pumping with turbo pump.
-
Feb 22:
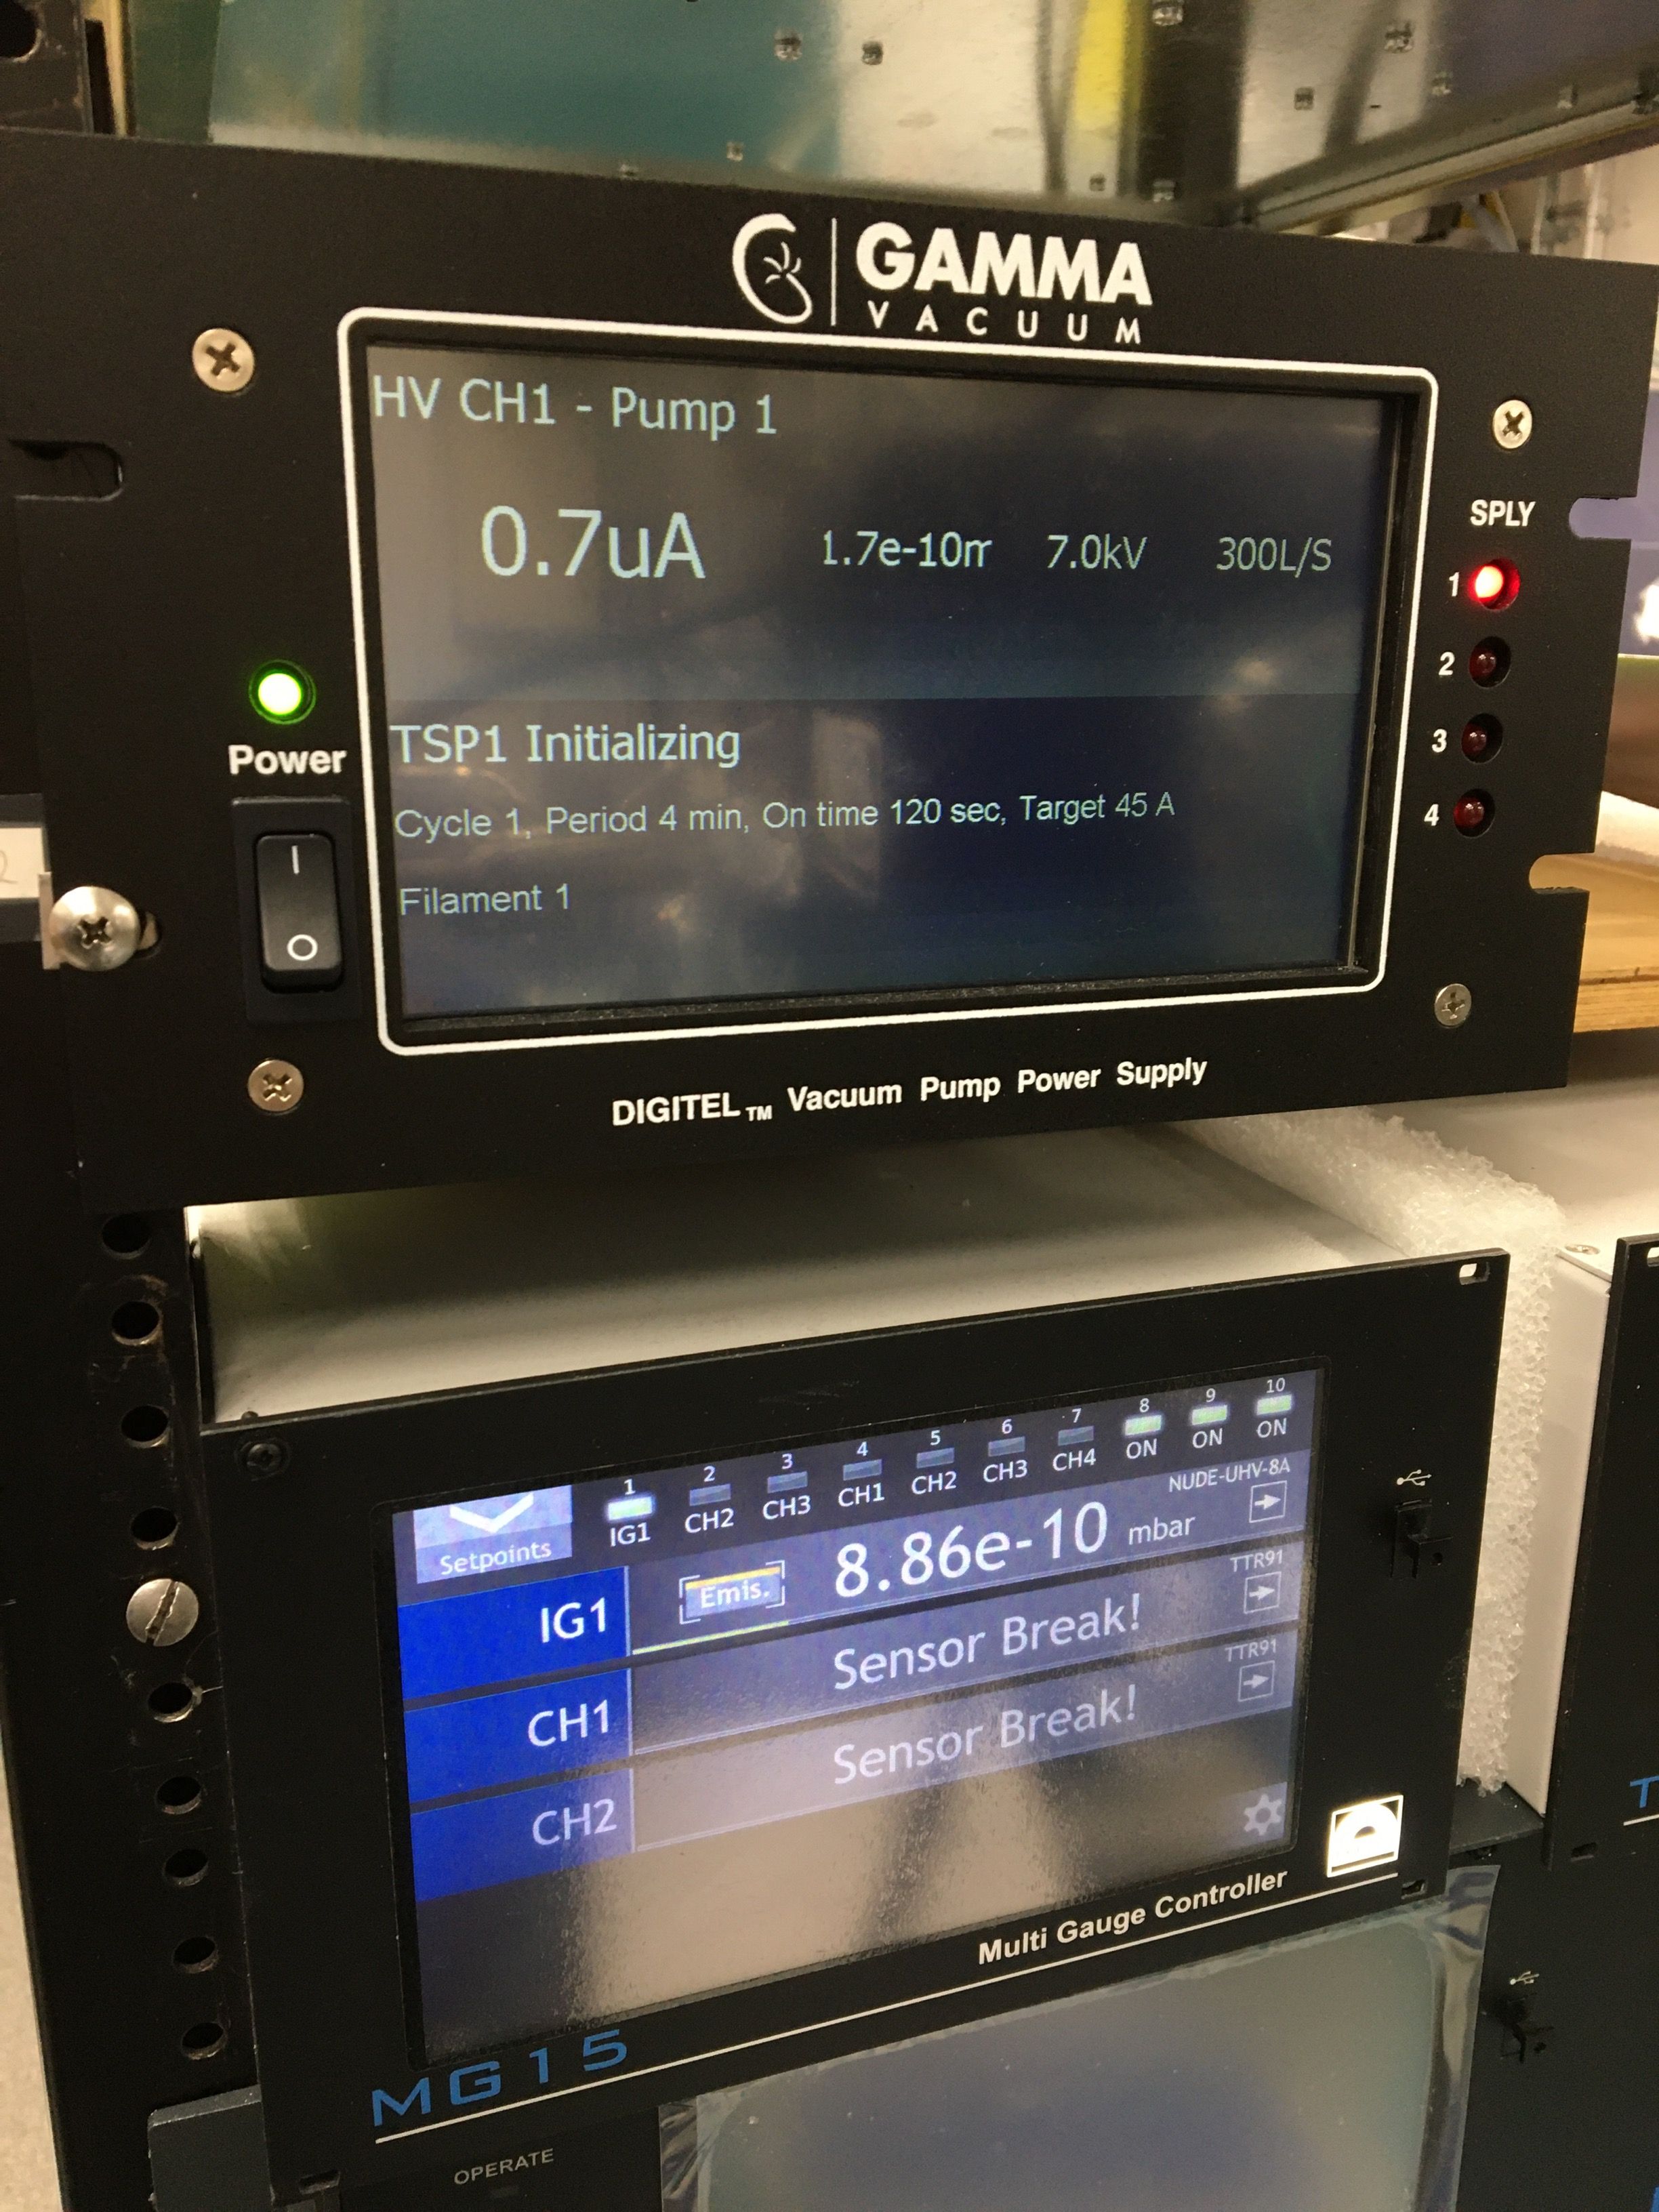
- Start ion pmup - could apply voltage now (7 kV), and it’s working (it might need restart several time before it continuously work - and should observe the current drops - maybe from mA to μA)
- and calibrate ion pump (related to the current reading accuracy) (need to disconnect HV cable while with Safecoon wire mounted and choose calibration).
- Installed software of RGA and mount electronics of RGA - mass spetra works well, leak check function works well.
- Did a He leak check - no leak find, even from loadlock - well done guys!
- Prepared a sample holder (we call it double layer) (temporary solution for RHEED and maybe for STM).
-
Feb 23:
- Change the EFM 3T mounting position (we put it in a wrong way - blocking the pyrometer window and cannot connect cable) - next time please consider the position of power cable (not block by bellow and linear shift), convenient position for shutter.
- Using the pump station to pump.
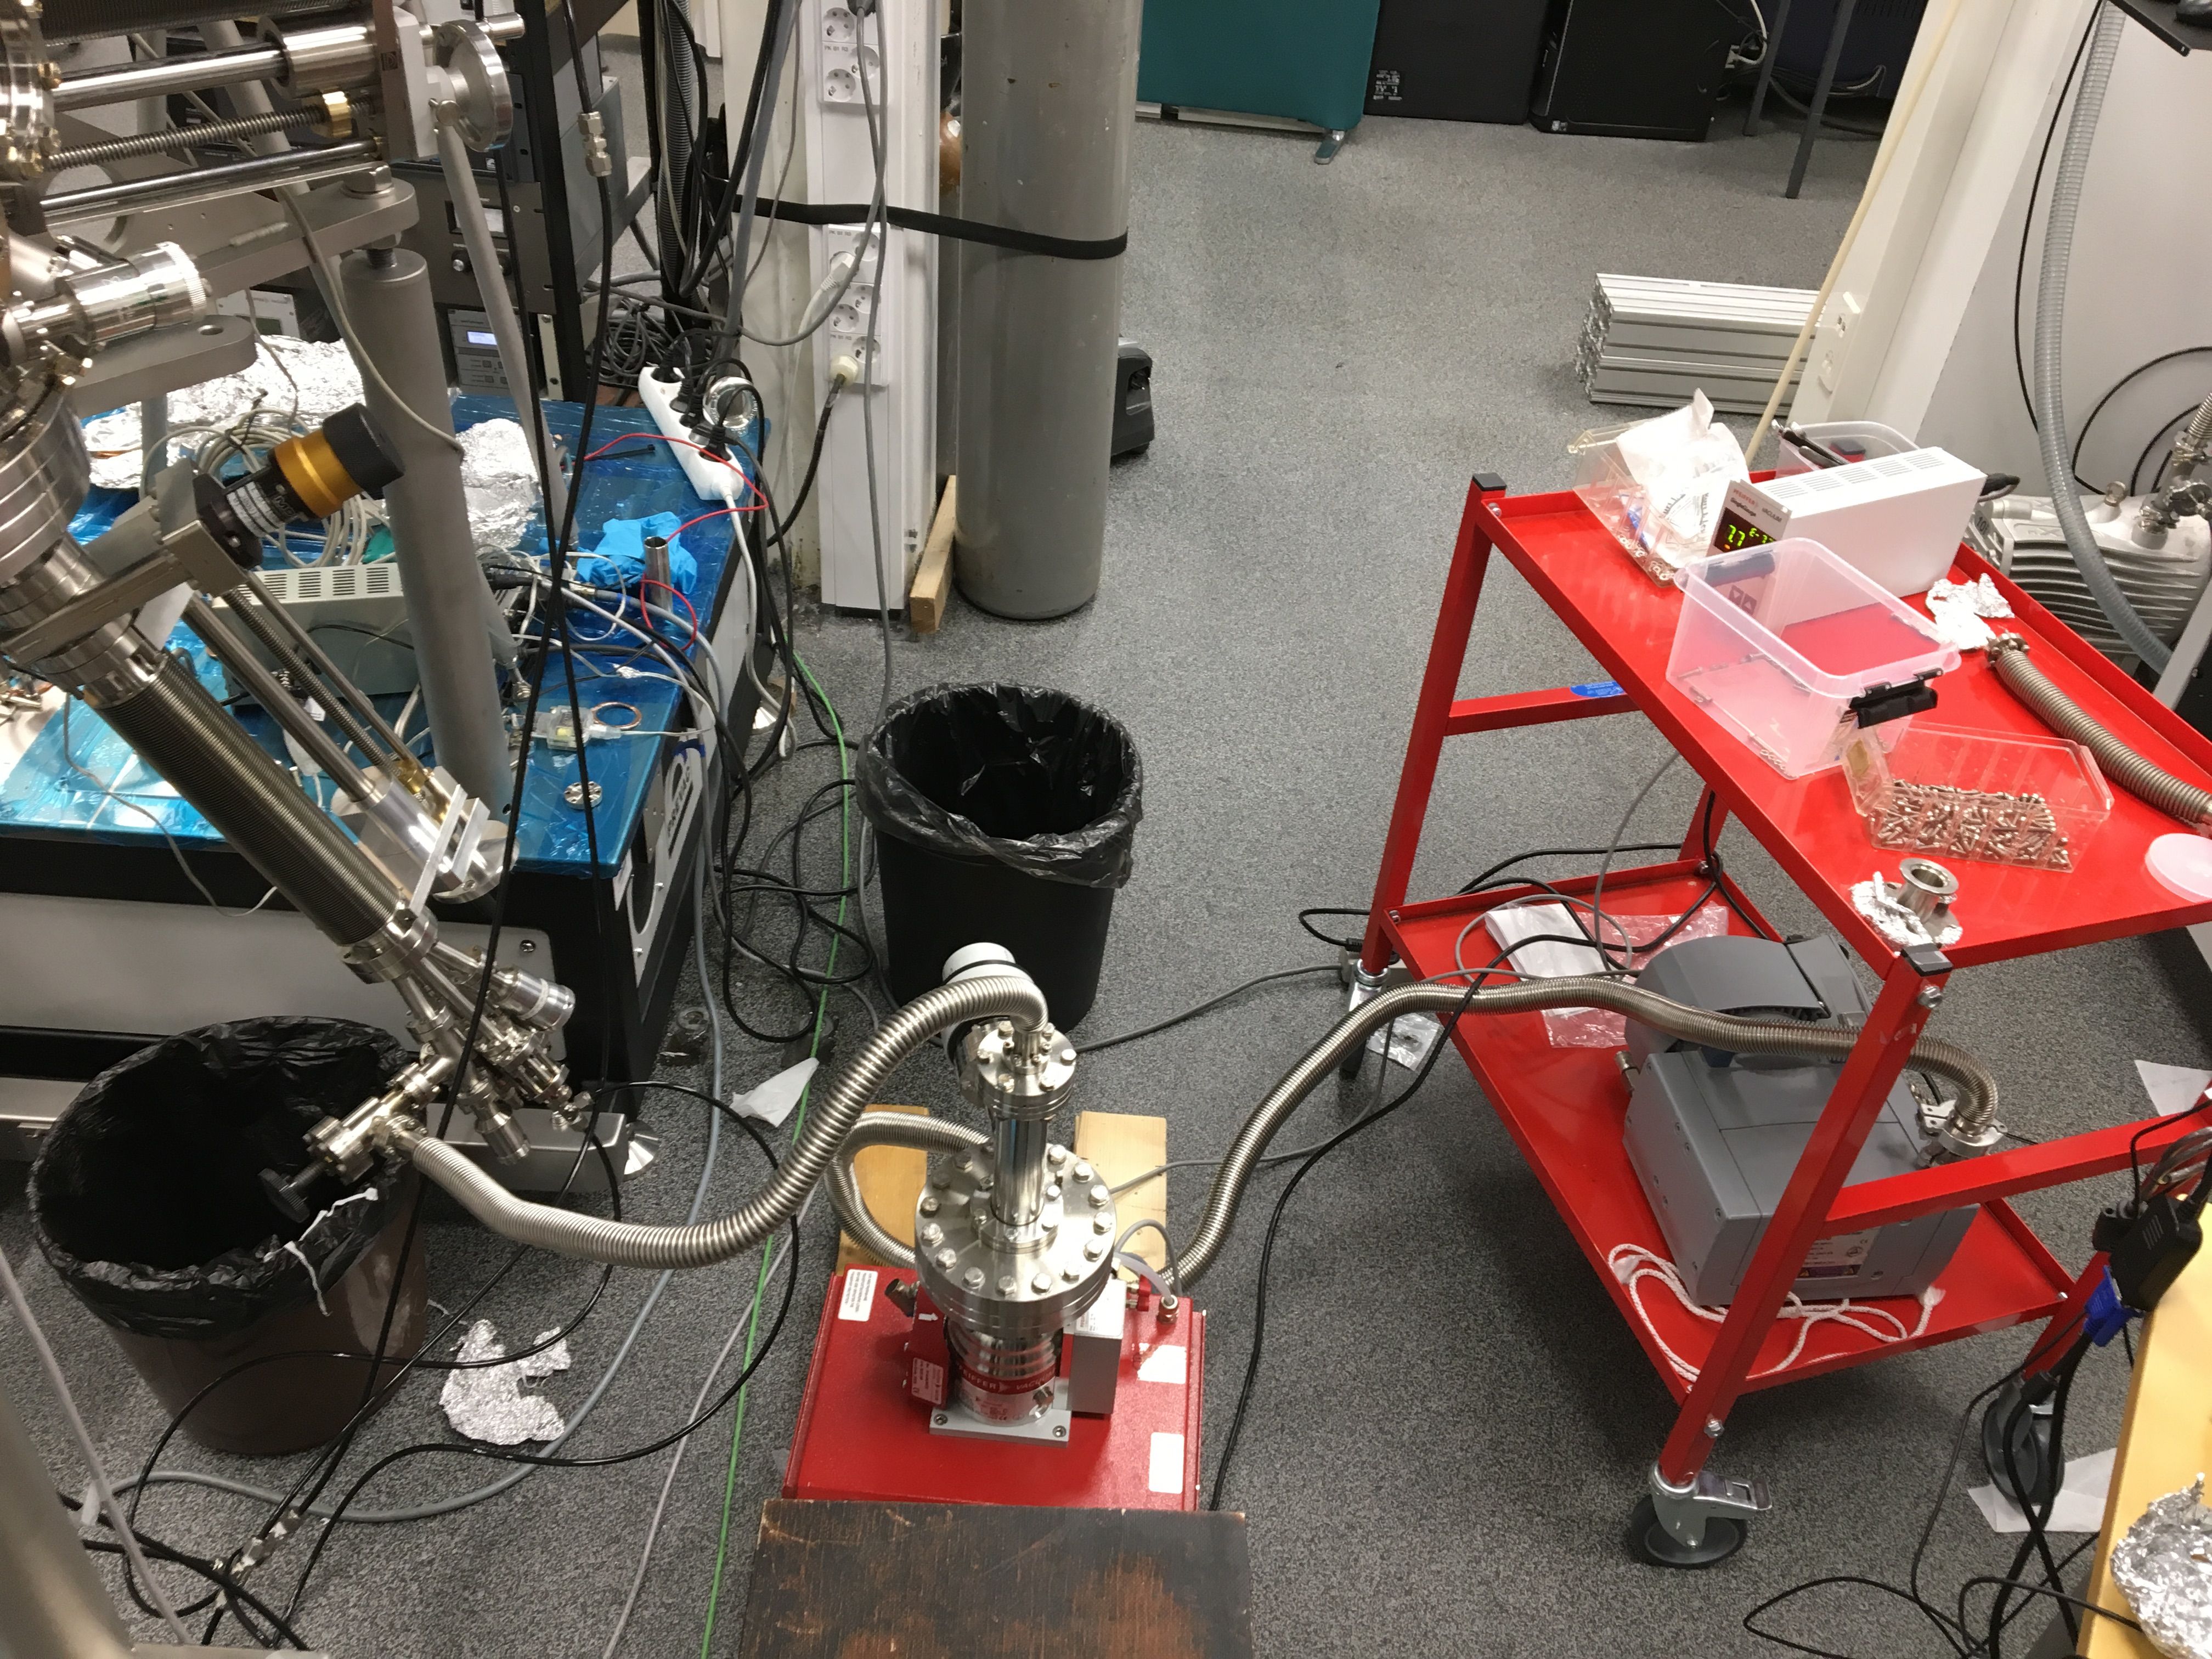
Fast change metal rod of evaporator, with an extension bellow, a gate valve, a pump station. -
Insert double layer sample.
-
Fixing cooling water pipes, by some guy - contact lab manager.
-
Connect N2 line to loadlock turbo, venting mode set to 2 (will automatically start venting with N2 when press stop).
-
Confirm a problem of loadlock turbo.venting valve (maybe) - (when back pump is on, turbo is not started, N2 line has some pressure, observed loadlock pressure never went down to E+0, and actually speed of trubo is 29 Hz - which means still some gas is go through the turbo - even if enable venting is off [parameter set: 012] or we didn’t put pumping station is on /start pump - it will automatically close vent valve. NOT SURE now).
-
sample holder:
from manufactor: sample above flag plate: ~2.1mm
one we get RHEED: ~6.4-6.5 mm
double layer one: ~6.1mm
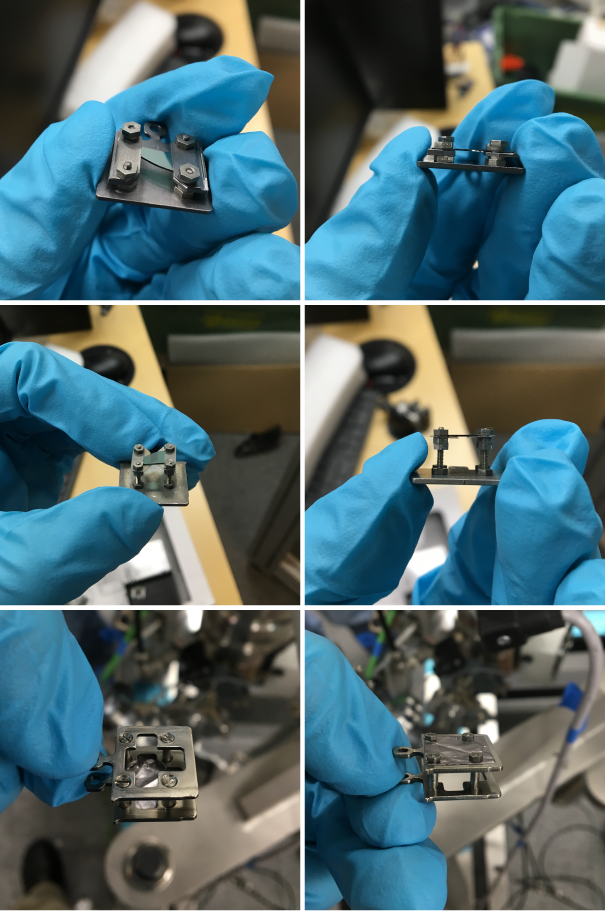
-
Feb 24:
- insert the double layer sample holder to manipulator - it fits. Heating the double layer sample holder (HEAT3 need to change the Safe SP Interlock setting: digital in - Safe SP Interlock - from input 2 (factory setting) to None). checking EB heating temperature with pyrometer - it gives temperature - thermocouple temp. is around 60 while pyrometer gives 400 C (Ta foil, emissivity 0.6).
- Tried TSP degas (filament 1 only, 20A, 2 mins). hand made interlock connection.
- handmade another double layer sample holder.
-
Feb 25:
- a new double layer sample holder is made and testing in a STM instrument.
- prepare baking (according to manual)
- use N2 gas to blow residue cooling water out.
- all bellow parts in half/middle position, maipulator XYZ in middle position, rotation in 0 degree.
- start baking at 16:45. Plan is set temp. step by step - 50, 80 (today + overnight), 100, 120. Maximum baking temp (from manual) is 150 C
- using some baking blanket covering
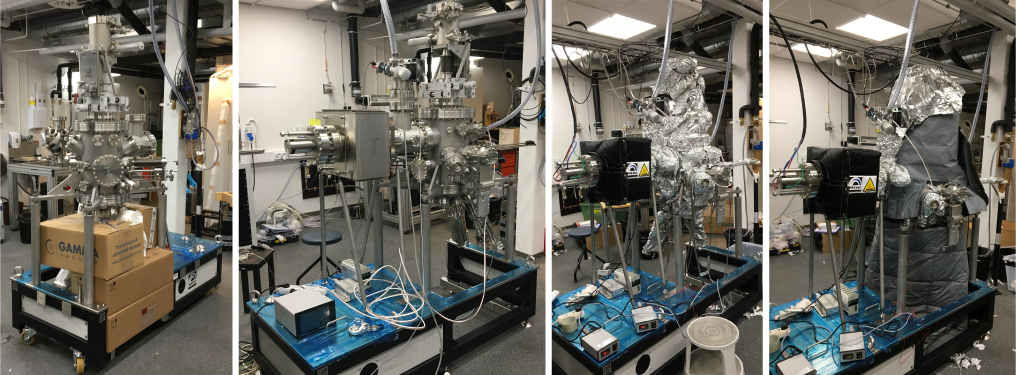
-
Feb 26:
- baking. using heating blanket to protect the heat. 2 thermocouple is used. according to manual, one thermocouple is put to 50 - 100 mm below highest point of manipulator (it’s the place where heat accumulates a lot from bottom.) we use 120 C for this position (and it reaches and keeps). another thermocouple is at RHEED screen and it’s set 110C (but it’s not reaching even at Mar 01.)
- degas somehow TSP
-
Mar 01:
-
pressure is in low E-7. . stop baking - yet change temperature to 70 degree - to degas. baking blanket is still there.
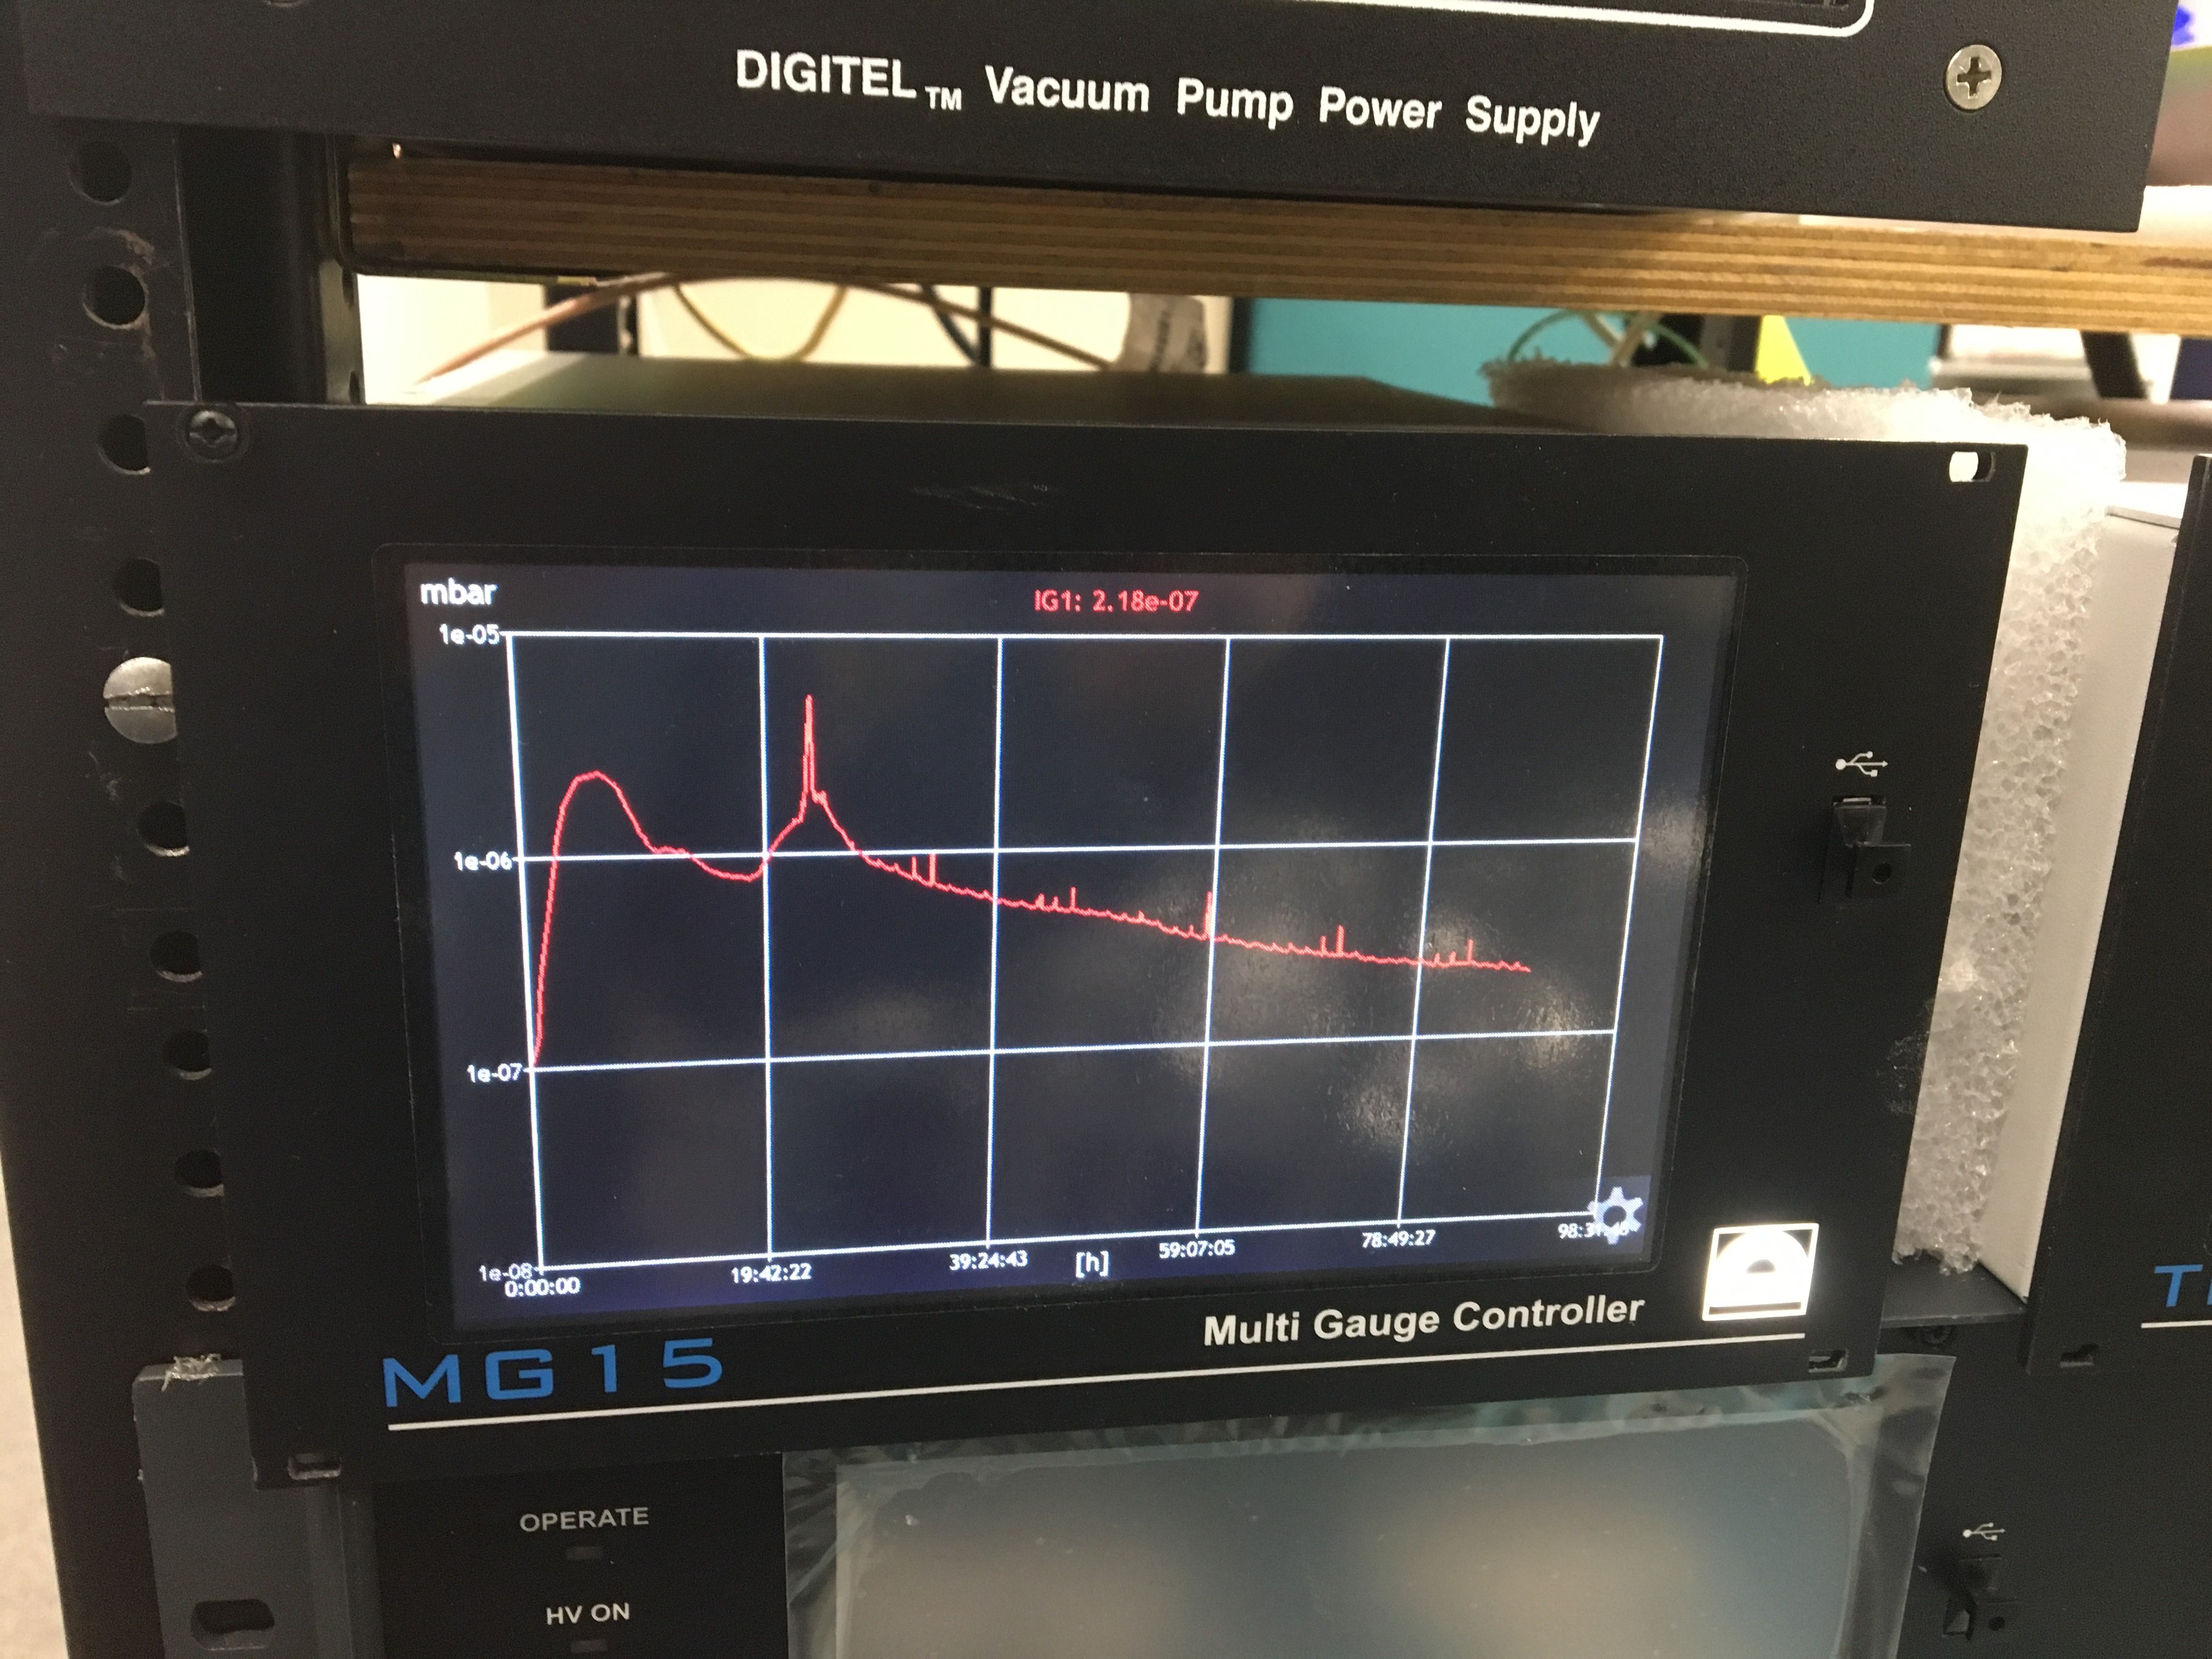
The baking curve. -
degas everything:
-
gauge - degas mode - default parameter
-
mass spectra (Residual Gas Analysis) - degass mode - default parameter. need to open filament and detect for a while and then can press “start degas”.
-
Start ion pump - it might go crazy of emission current (also gauge go crazy of pressure) - it need degas somehow. when emission current goes too high e.g. > 70 mA (just in few seconds), quickly turn off HV. andwait for a while for vacuum recover, repeat this several times and until emission current didn’t go crazy but rather stable at low mA e.g. 30 mA (highest value of emission current you may see) and at that time it might good to keep HV on and you will see the drop of emission current.
-
TSP filament
-
RHEED filament
-
manipulator heating stage filament (when open HEAT-3, thermocouple shows temp. ~ 76 degree.)
-
metal evaporator EFM 3T -first filament (first only apply current)- then metal rod (apply voltage + insert rod)
-
Se thermocracker - first CRacker and tube (maximum current ) - then drop some temperature and start RESevior (maximum 110 C)
-
last step for the day - Start TSP overnight (40A, 2.5 min, 2 hours). normally for MBE chamber, TSP will work at least everynight or every several hours to keep good vacuum (which is different from Createc2 - MBE has more growth)
-
-
Mar 02: Oh no - pressure overnight is E-9. have some leak. at the gate valve to analysis chamber blank stop, the stop have a leak - closed gate valve. perform a leak check. main chamber down part have some leak around there - tighten screws several rounds. it seems all Cu gasket and Cu wire of manipulator now have Se on it. It turns dark.
-
Mar 03: ask for one day off - get tired of endless problems need to solve. colleague checked there is a potential leak around gate valve between EFM 3T and chamber, Even though that gate valve had been checked with leak check before (which means leak check is not a guarantee? because the leak is so small)
-
Mar 04: try to confirm again the leak position. base pressure would be like ~ 4E-9 mbar, even with overnight TSP. need to carry on with this leak currently. will change the gate valve next time.
-
Mar 05: try to confirm again the leak position - from the right side of that gate valve. Is RGA at good position? leaking we only see a steady base pressure going up, not a peak.
-
Mar 07: obseved: vacuum becomes slightly bad. from 4 E-9 to 5E-9. Ion pump current become large: 8-9 uA to 13 uA.
-
Mar 08:
- gauge graph shows she vacuum become worse during weekend, steady slowly increasing
- degased twice HOPG sample.
- didn’t get RHEED of HOPG, on double layer sample holder.
-
Mar 09: try again RHEED. double layer sample still no. add 1 mm nut to make HOPG higher, still no (the height difference between this and previous SiC one is maybe 0.1 mm). play with previous SiC one, and it turns out rheed is very sensitive to position, window to get it is quite small.
-
Mar 10: RHEED, still RHEED - play a lot with previous SiC sample.
-
Mar 11: test RHEED again - use a ceramic sample to find the RHEED gun electric beam.
-
Mar 12: test RHEED with HOPG - got the RHEED we expercted.
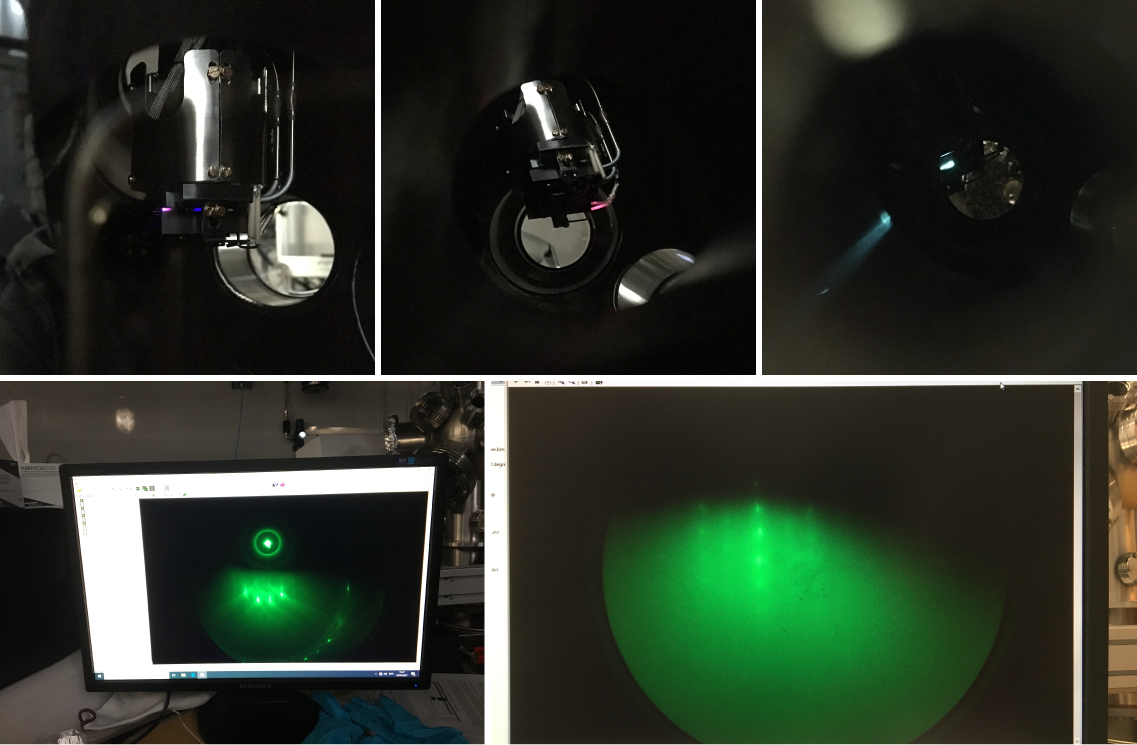
Upper panel: Dumb ways to get the electron spot hit right on sample, by monitoring the electron beam hitting some ceramics of heating stage; blue and violet color shows roughly where the beam is. (rightmost) Finally it hit SiC sample.
Lower panel: (left) First RHEED pattern of SiC in the lab. (right) First RHEED pattern of HOPG in the lab.
- Mar 15: degas, grow VSe2 on hopg + RHEED of VSe2 (quartz balance is not using this time). windows is getting red again. AFM is down so not checking growth result.
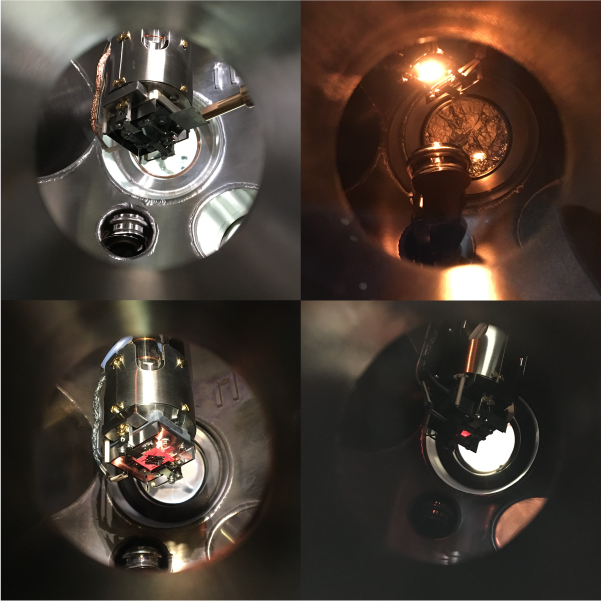
Upper left: The moment of inserting a sample holder.
Upper right: Degasing filament.
Lower left: Electron bombardment (EB) heating, HOPG as the sample.
Lower right: Direct heating SiC.
-
Mar 16: check metal evaporator, Se flux. Se, you are bad guy - so naughty. get out enough flux at even 60 C degree. V, some flux; Mn, a lot flux; Nb, no flux (because of the rod diameter of 2 mm? we will see when change to 1 mm)
-
Mar 17: abrupt power off. check RHEED, base flat sample holder, ceramic, to see the beam spot. the cooling shield is not blocking any beam. VSe2 checked at a STM.
-
Mar 18: morning checking HOPG RHEED - no pattern. afternoon, checking SiC RHEED - 10 seconds to get. manipulator rotation angle is very crucial - only a small window you can get. and it’s confirm even if RHEED beam hitting right on the sample, you may not get because the pattern electron is repulsed by charge accumulated at thermocouple ceramics.
-
Mar 19: morning check RHEED of HOPG again (no RHEED pattern) and degas (RHEED show up again - some dirt on HOPG?). Afternoon, grow MnSe on HOPG with Se cap. (while after Se cap then Xin realized MnSe doesn’t grow on HOPG. the plan was MnSe on NbSe2 -but this time Mn and Se flux is double checked again, and played Rheed again, and know what happen to Rheed pattern when something is not growing - still fruitful)
-
Mar 20: grow another sample of VSe2 on hopg. RHEED show clearly extra stripe/rod.
-
Mar 22:
-
VSe2 is in STM loadlock. STM is still checking XPS and it’s still encountering problems. After some test of Ag.
-
degas again the V rod and degas the HOPG. and start growing VSe2 with quartz balance, RHEED, RHEED pattern checking (a whole layer covering).
-
Epilog
After three months’ work, the new MBE started works. Soon later it serves for almost all transition metal dichalcogenides synthesis in my work, including the VSe2, NbSe2, MoSe2, FeSe…
When our MBE was built, it was the only one MBE in the whole university. (Micronova has a MBE lab, but there is no MBE setup.)
There was a internal chat channel named MBE for making better everyday.
As you read, during the process we took a few detours in targeting the RHEED electron beam spot right on the sample. For this we made several sample holders and a poor man’s method (use ceramic and SiC to monitor the flurorence of electron beam hitting and then know where the beam spot is) is used.
The chamber’s vacuum state is not that good (base ~ several E-9 mbar), and later in August 2021 we again perform a leak check and the mass spectra RGA shows a unusual high peak at mass 18 — yes, it’s water H2O! Peak of N2 (28) and CO2 (44) are much smaller. It finally turns out the leak come from Se cracker’s internal cooling water pipe inside - also no-known cures to fix.
Later when growing in higher temperature, I introduced LN2 to cool down the manipulator.
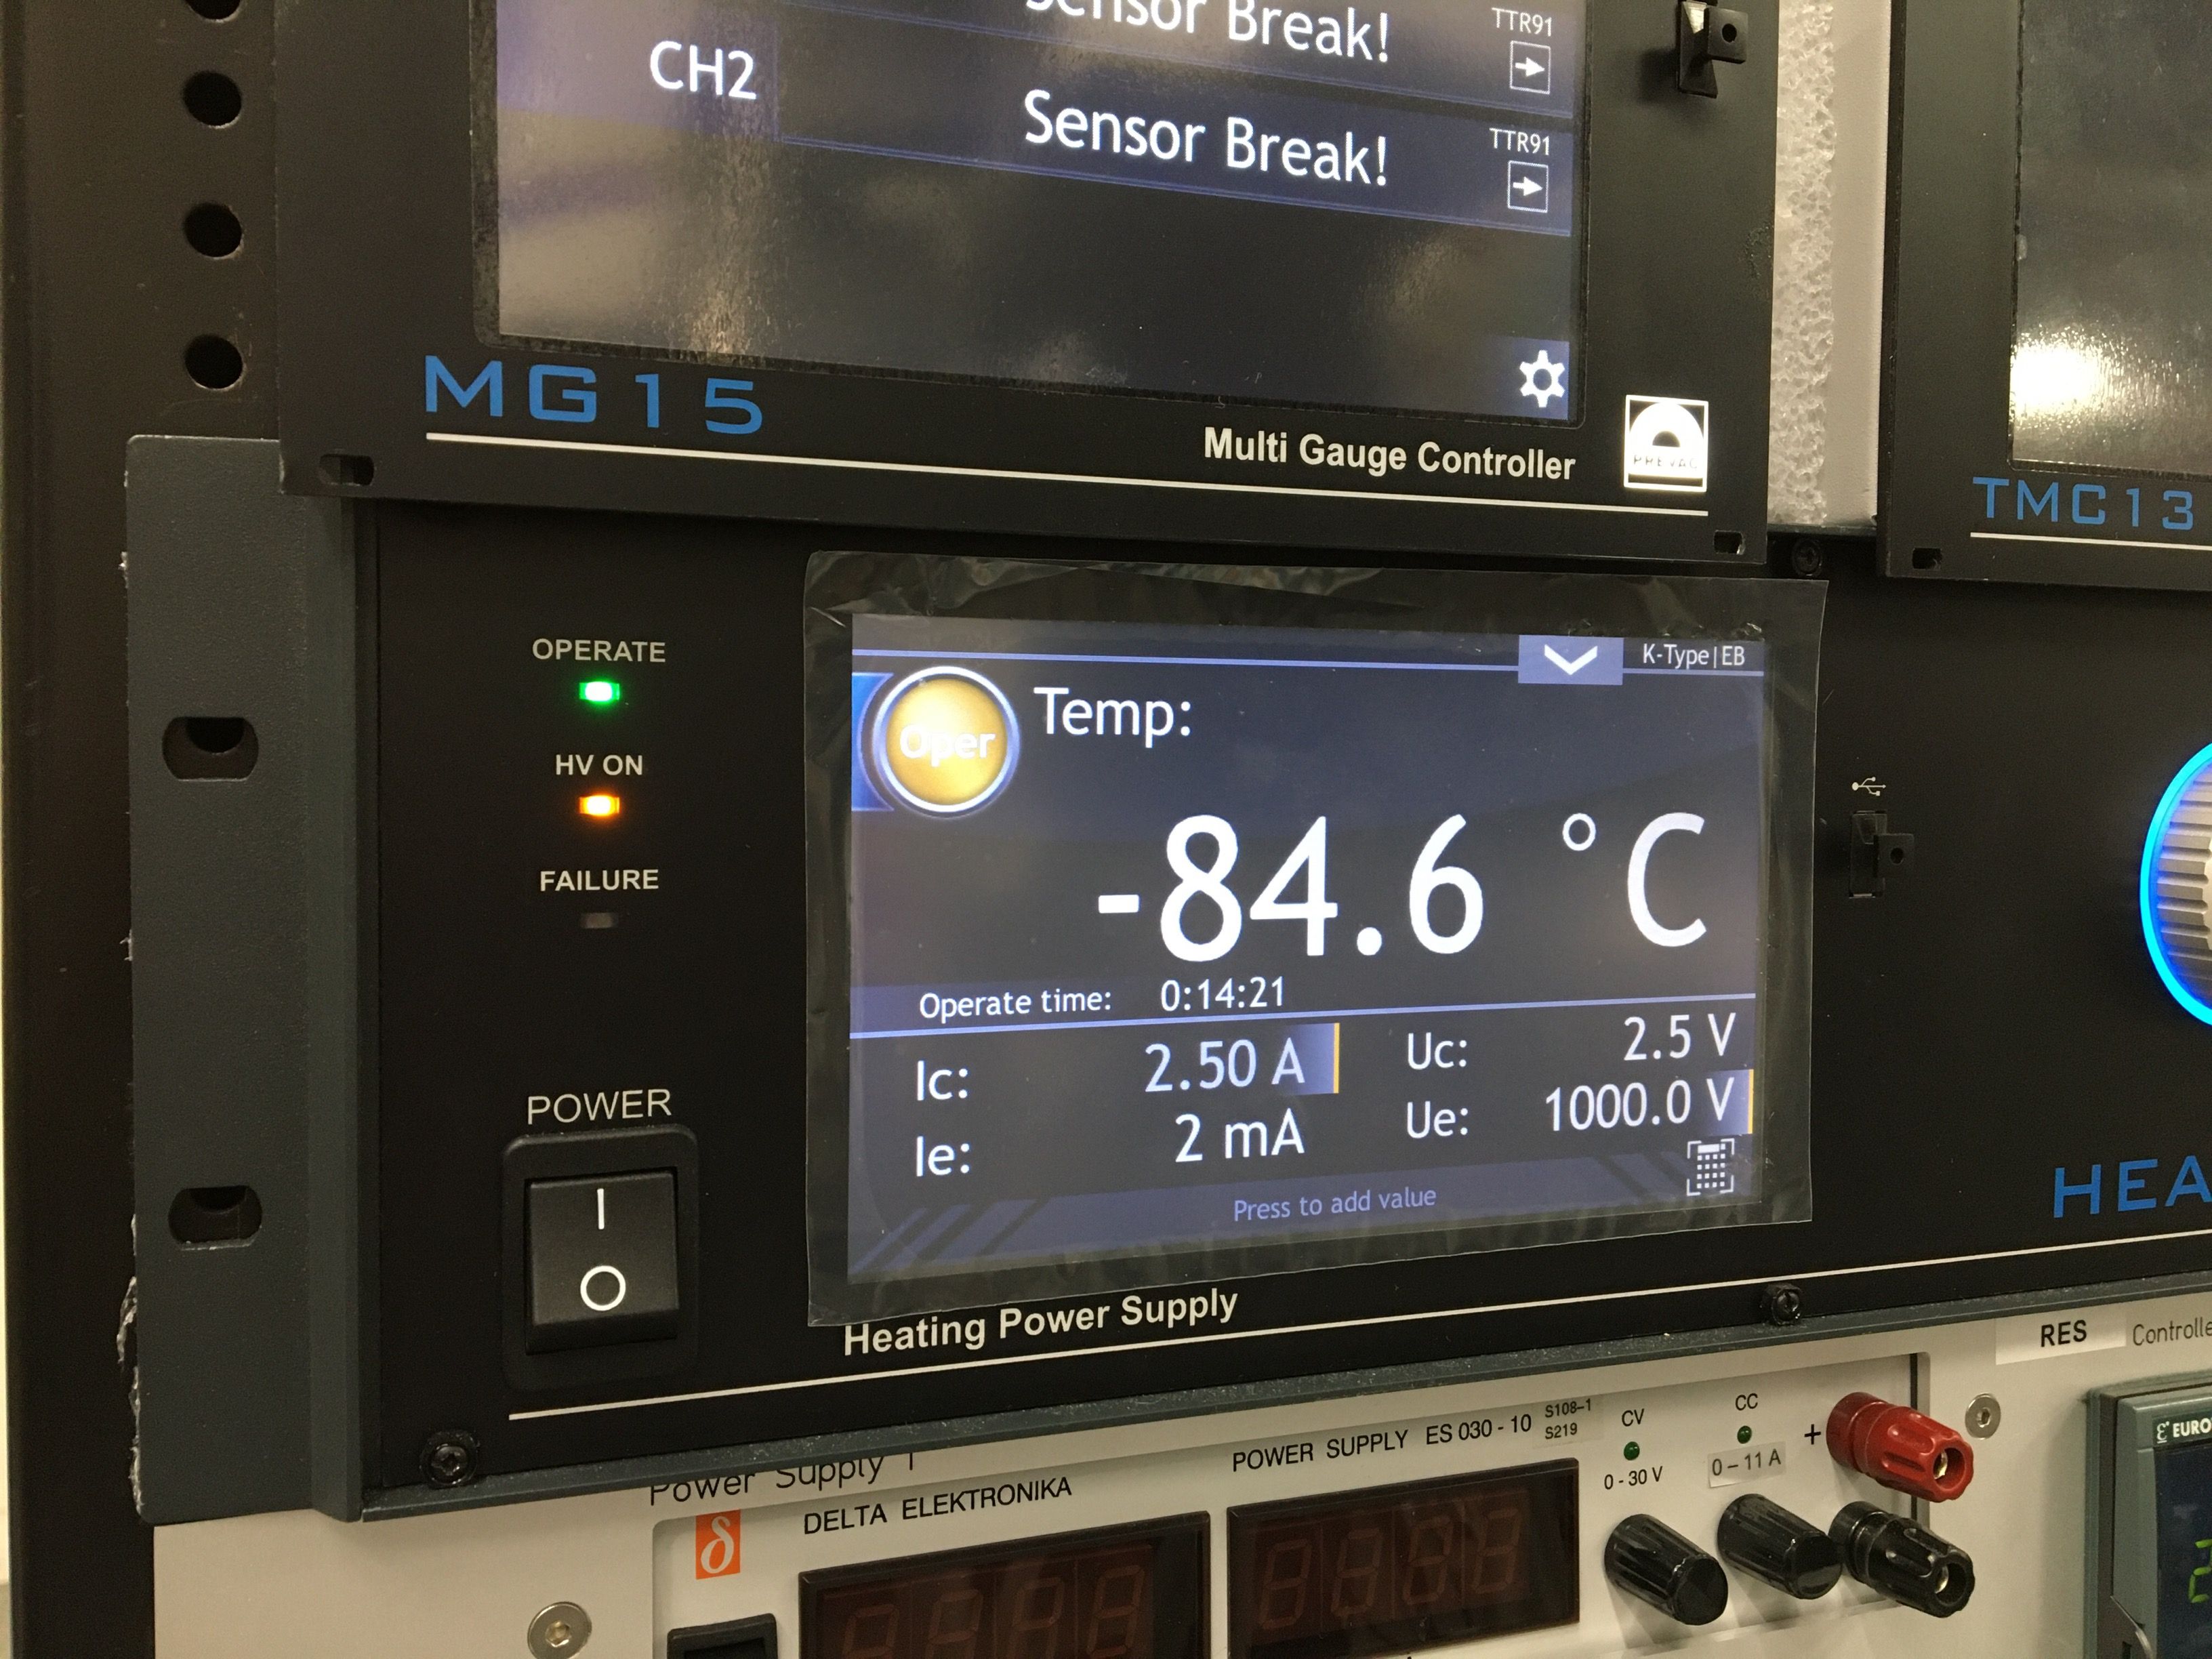
And it also working as a cryopump, so base pressure is even better.
